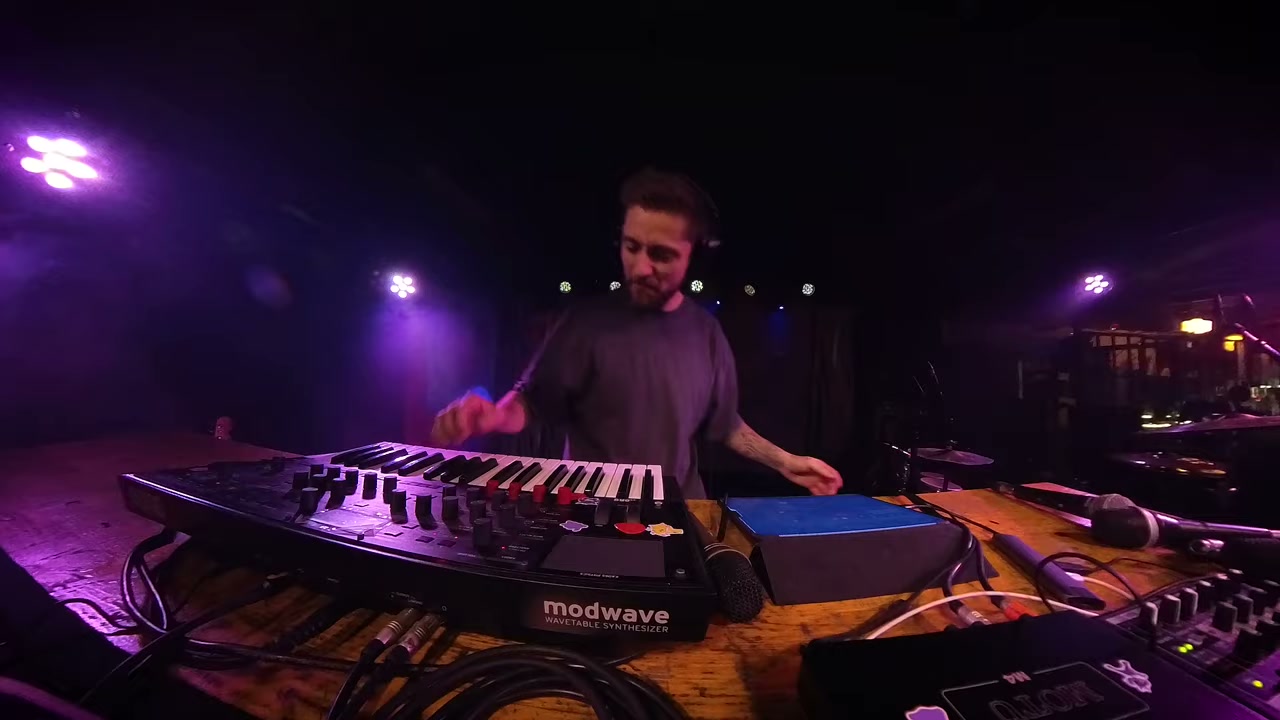
The full Loopy Pro live-looping system of Kristof Nagy (Vocal Total 2023, Liarbird.com), reverse-engineered shot by shot. Re-mapped to your actual plugin arsenal: mindset, template architecture, CTZ-style mastering, the Neuro Bass Generator 2000, and the Modwave hardware star. Every claim cross-checked against named sources.
13 sections1 master templateGenerated 2026-06-04
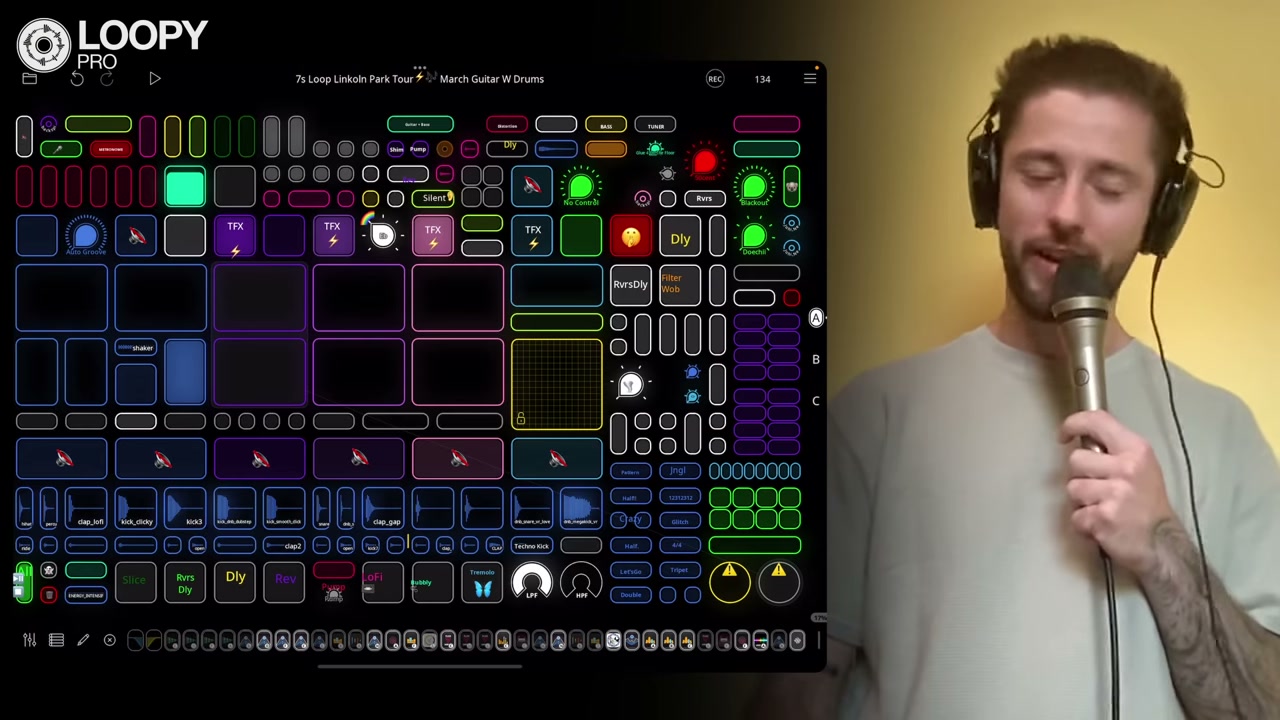
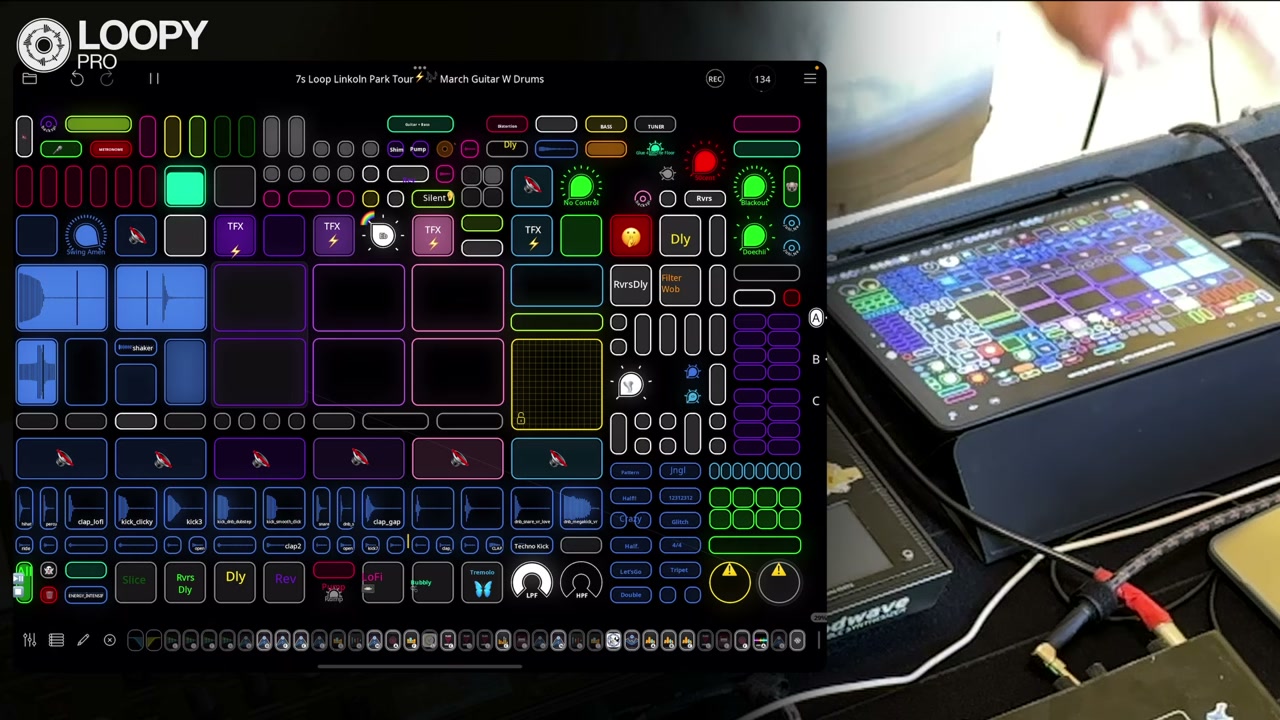
Kristof7s' Master Template. One Loopy Pro session, every song, every genre. The complete vocabulary lives on this single screen. Each region maps to a deep-dive section in the sidebar.
2. Template Design Philosophy
Mantra · one master template · color-coding · gestures
Kristof's rig looks like a fighter-jet cockpit and behaves like a single instrument. Behind the visual density sits a small set of design rules that compound into hours of uninterrupted live performance: one master template instead of per-song presets, a strict color-coded clip grid that maps to instrument families at a glance, and multi-action buttons where Tap / Double-Tap / Long-Press / Press-Release / Directional-Swipe each fire 8 to 10 simultaneous actions. The complexity is engineered to disappear at the keyboard.
2.1 Mantra
design thesis · "It looks super complicated for it to be easy"
"It looks super complicated for it to be easy."
Kristof references a sax player who said the same thing about his instrument: visual density is the price of a flat skill ceiling once the muscle memory is in. The rig is dense so the performance can be loose.
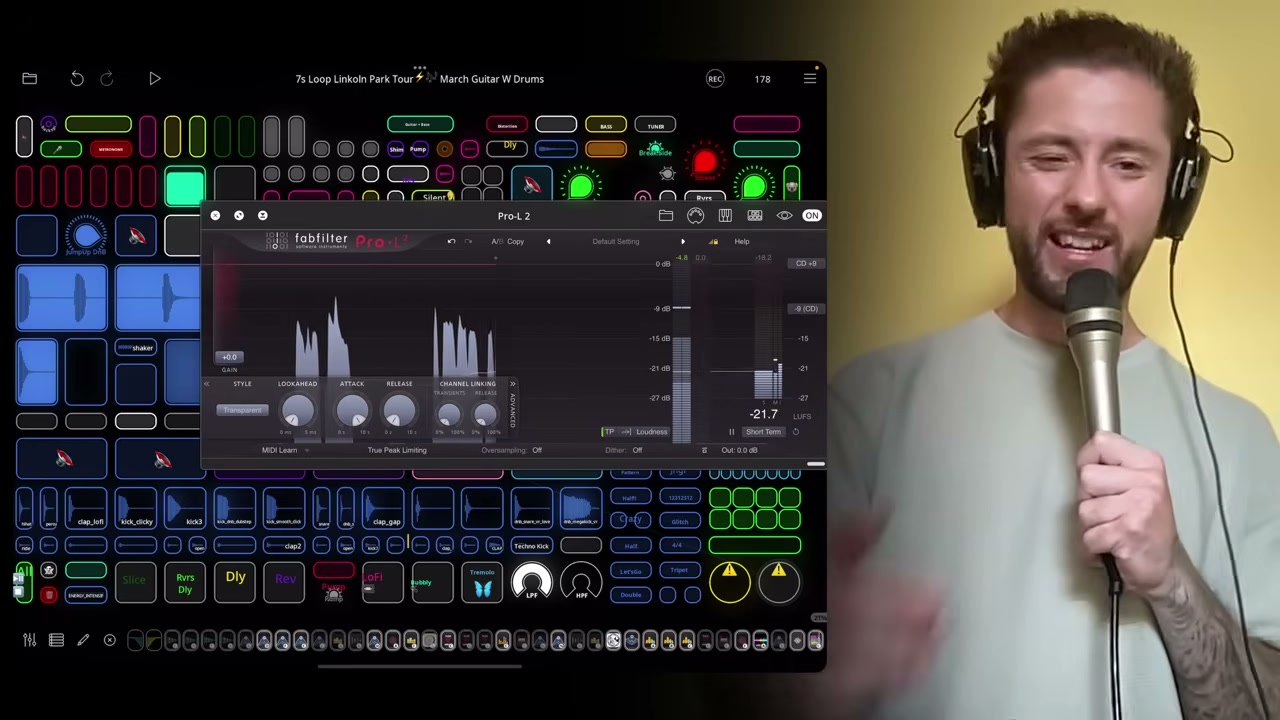
VDbYaq 00:00:20 The iconic composite: the full color-coded Loopy Pro clip grid titled "7s Loop Linkoln Park Tour - March Guitar W Drums" fills the left ~70% of frame, Kristof at the mic on the right. This grid is the master template - every song he plays lives inside it.
2.2 One master template for everything
no per-song presets · DJ-style continuous sets
DJ-style continuous sets - there is no pause between songs. The template carries the show.
When a song needs something new, he integrates the new capability into the master template - so even random improvisation downstream benefits from the addition.
The template evolves daily - in his own words: "it's still evolving every single day."
Multiple pages (A, B, C) for additional controls, accessed via the right-edge page selector visible on the grid.
He won't share the template file but explains every concept openly - he sees the value in understanding the system, not in copying the layout.
"I'm not a gatekeeper. I don't believe in handing stuff like this - I believe in understanding concepts and making your own of it."
Kristof7s on why the template stays private but the method is public
Architectural Bet
One template scales further than 50 song-presets
Improv Dividend
New capability added once, available everywhere
Authoring Mode
Daily increment, never a rewrite
whf-J9 00:50:00 Full Loopy Pro clip grid on the left ~70% of frame, alongside an iPad close-up of the same session. The workflow is readable at a glance precisely because the layout never changes between songs.
2.3 Color-coding
5 main colors + 3 helpers · instrument family at a glance
Eight colors. Each one maps to a fixed instrument family across the entire grid, every song, every page. The eye learns to find the bass row before the brain reads any text. Gray is the only one with mechanical behavior baked in: a gray clip is a bass-resample that is linked-exclusive to purple - hitting a gray pad stops whichever purple bass was playing, automatically.
Color map · instrument family
Dark BlueDrums
PurpleBass
GrayBass-resampling (linked-exclusive to purple: gray plays -> purple stops)
VioletHarmony
PinkHarmony and/or Melody
Light BlueLeads, Vocals, Lead Lines
BrownNoise Synth / XY Pad
GreenResampled Full Instrumental Mix (everything except drums)
Signal logic · purple / gray exclusivity
PURPLE bass clip playing (rendered live, Color Bass / Neuro / Reese)
|
+--> you tap a GRAY clip
|
v
GRAY bass-resample fires (pre-baked stem, identical pitch / tempo lane)PURPLE auto-stops (linked-exclusive group - the "-> purple stops" rule)
VDbYaq 00:01:30 Split frame: full Loopy Pro clip grid on the left, the physical iPad on a stand next to the Modwave keyboard with audio cables on the right. The dark-blue drum row, the purple/gray bass twin-row, the violet/pink harmony block and the brown/green outer columns are all directly readable from the grid colors.
2.4 Gestures - 1 button = many actions
tap · double-tap · long-press · press-release · swipe
The multi-action model
A single button is not one trigger - it is a grammar. Each interaction mode (tap, double-tap, long-press, press-and-release, directional swipe) is a different word, and each word can fire 8 to 10+ simultaneous actions at once. One press can mute a clip, toggle a filter, swap a Looperator preset and re-arm sidechain in the same instant.
Tap = primaryDouble-Tap = secondaryLong-Press = tertiaryPress-Release = momentarySwipe = preset nav
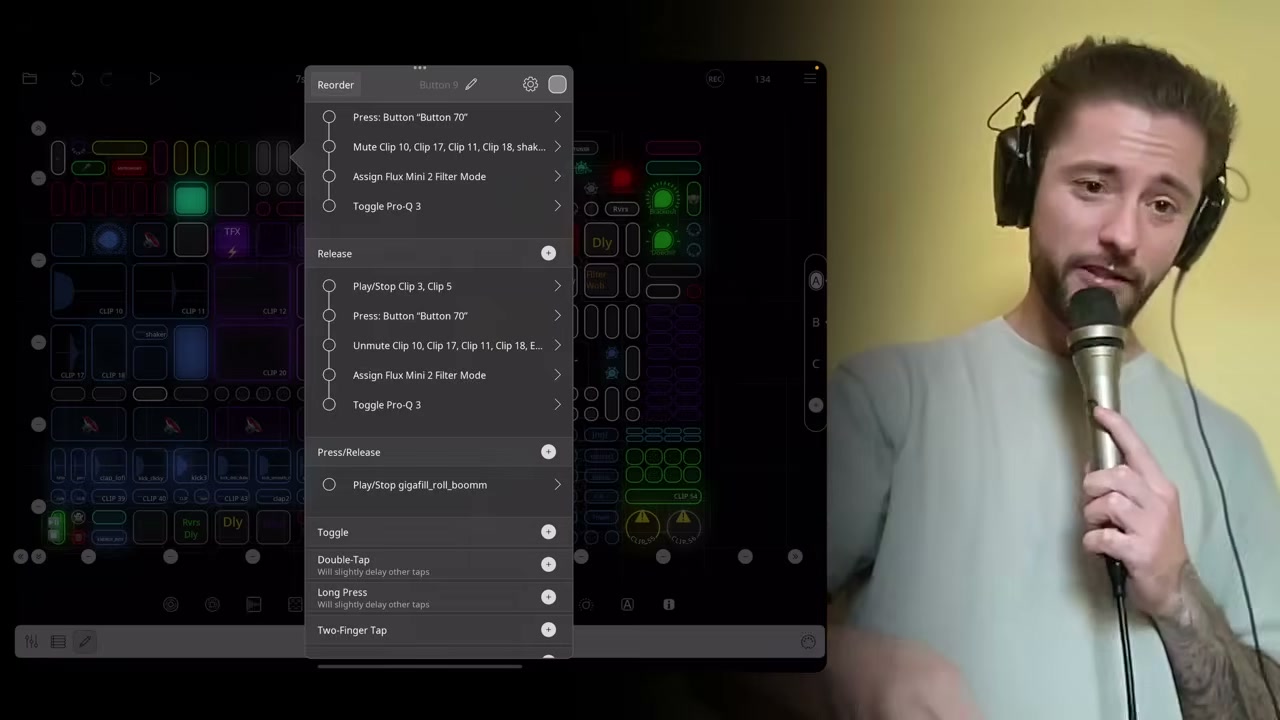
whf-J9 00:45:00 The action-list popup for a single button. Press / Release / Press-and-Release tabs each carry their own stack of actions ("Mute Clip 10, 17, 11, 18...", "Assign Flux Mini 2 Filter Mode", "Toggle Pro-Q 3"). This is the UI that powers the multi-action button system.
Gesture vocabulary · what each interaction means
Gesture
Role
Concrete example from the rig
Tap
Primary action
Play / Stop the clip the button is bound to.
Double-Tap
Secondary action
Toggle an effect (e.g. arm an overdub on the same lane).
Long-Press
Tertiary action
Remove / clear an overdub on the lane.
Press-and-Release
Momentary (hold = active, release = off)
Build-up holds: press to engage filter / FX, release to drop. Press-tab fires a stack, Release-tab fires the inverse stack.
Swipe Up
Directional preset nav
Aggressive preset bank (heavier drums, distorted bass, harder Looperator).
Swipe Right
Directional preset nav
DnB preset bank.
Swipe Down
Directional preset nav
Swing preset bank.
Long Swipe Down
Special
Reverse (verified in his "5 musicians" snippet).
Action stacking · one press, 8-10+ events
[ONE BUTTON PRESS]
|
+-- Press: Play Clip 3 | Press "Button 70" | Mute Clip 10, 17, 11, 18, shaker, ...
| | Assign Flux Mini 2 Filter Mode | Toggle Pro-Q 3
|
+-- Release: Play/Stop Clip 3, Clip 5 | Press "Button 70" | Unmute Clip 10, 17, 11, 18, ...
| Assign Flux Mini 2 Filter Mode | Toggle Pro-Q 3
A button can reference another button -> simpler mental model, dense behaviorStep Dials with follow-actions auto-advance verse 1 -> verse 2 on each tap
Reference, don't duplicate
A button can reference another button - keeps the mental model simple while the behavior stays dense.
Step Dials
Follow-actions auto-advance song sections (verse 1 -> verse 2) on repeated taps - no second hand needed.
8-10+ simultaneous
One press fires 8 to 10+ actions at once. The grammar collapses entire transitions to a single touch.
2.5 His favorite Loopy Pro feature
5-musicians snippet · on why this design works
"One button can do so many things with different interaction modes - that's a game changer."
On why he switched to Loopy Pro
"Long swipe down = reverse, double tap = overdub, long press = remove overdub. It's an instrument, the button is not specific to the track - that's the point."
On generalisation vs per-track wiring
"Less button pressing but more buttons. Same amount of pressing, much more sense, no weird muscle memory."
The headline thesis - density beats menu-diving
Why this design pattern matters for your rig
Generalised buttons beat per-track wiring. If "long-press = remove overdub" is true everywhere, your hand stops asking which track it is on.
Visual density is not the enemy of speed - the only thing that matters is whether each visual element has a fixed meaning. Color-coding does that for instrument families; gesture vocabulary does it for actions.
Daily incremental authoring beats big-bang rebuilds. Every new song teaches the master template one new trick that every other song inherits for free.
Don't gatekeep, don't copy. Understanding the rules is the upgrade; cloning the .lpproj file is not.
Section 3 / Compendium
Drum Section Workflow
CORE ENGINE
The drum layer is where Kristof's whole "one man, one looper, replace the DJ" thesis lives or dies.
His solution is split brain: a live-looped beatbox backbone (kick + snare from his mouth)
underneath a pre-produced top layer (hi-hats, perc, crashes, ghost notes) that he treats like a drum machine,
cycled by a Step Dial, mangled by Looperator, and punctuated by Amen breaks and on-button fills.
Below: every concrete moving part, in his own order.
3.1 Pre-produced "top loops"
The split he committed to: backbone live, groovy layer baked.
Kick and snare come from the mic and get live-looped. Hi-hats, percussion, crashes, cymbals
are pre-produced in Ableton and triggered from the clip grid.
What lives in the top layer: hi-hats, percussion, crashes, cymbals - the groovy layer on top of the live-looped kick+snare backbeat
Where they were built: pre-produced in Ableton, not live-looped
Why this split: tight electronic groove + ghost notes + unfamiliar stages = impossible to keep tight live with beatbox alone
How he frames it: "I treat them like a drum machine - I picked my poison"
"I treat them like a drum machine - I picked my poison."
- Kristof7s, on accepting baked top-loops over live-looping everything
whf-J9 00:58:00 Loopy Pro clip grid - multiple drum-clip waveforms in the left column. These are the batched, pre-produced top loops he triggers from a single column of buttons.
3.2 Step Dial cycles preset packs
One Step Dial widget walks the top-loop column through genre-shaped packs.
Each click of the dial swaps the loaded clip set for a different stylistic family,
so the same button column can mean four different drum personalities depending on dial position.
HouseDnBSwingAggressive+ more
The Step Dial is the macro-level genre selector - everything else (live kick/snare, Looperator, fills) stays the same;
the dial just retargets what flavor of top loop sits underneath the performance.
3.3 Looperator on the drums - the #1 favorite plugin
Sugar Bytes Looperator sits on the drum bus and turns linear loops into
generative mutations - re-slicing, auto-groove, half-time conversion, jungle patterns. Kristof calls it his single
favorite plugin inside the Loopy ecosystem.
What it does on the drum bus
Why it earns its CPU
Re-slicing
Same loop, new rhythm - "instant remix" without leaving Loopy
Auto-groove
Pushes/pulls hits off the grid - feel without re-recording
Half-time conversion
House loop becomes a DnB-feel loop with one button - genre-bend mid-set
Jungle patterns
Amen-style chops on the fly, no extra clip needed
"There should be an individual tutorial for Looperator, because what you can do with that effect inside of Loopy is the best thing ever."
- Kristof7s, naming his desert-island plugin
3.4 Amen breaks + fills - "I'm the drummer at the same time"
Where the top-loop column handles groove, a second arsenal handles drama and transition:
Amen breaks, tom rolls, manual snare slices, and risers. None of them are played on a drum pad - they all live on buttons.
DnB STANDARD
Sampled Amen breaks
The canonical DnB break, sampled and processed in Ableton for tightness before it ever touches Loopy. Triggered from a button when the set needs that classic chop.
PRE-MADE
Drum fills on buttons
Toms, breaks, multi-bar fills - each sitting on a dedicated button. Hit it, the fill plays, you're back on the kick. No drum pad, no kit playing.
FREESTYLE
Snare slicer
For the manual freestyle fills - he can chop a snare hit on the fly when he wants a fill that wasn't pre-built.
TENSION
Buildups + risers
Pre-made buildups + risers in various lengths. Pick the one whose duration matches the bar count you need to fill.
"I'm the drummer at the same time - without playing the drums manually."
- Kristof7s, on solving the one-person-band problem with buttons
3.5 Session start - 3 methods to get the train moving
Every set has to begin somewhere - first downbeat, first loop, first feel. Kristof has three
different starts tuned to three different moods. None of them is "press play".
   METHOD                  TRIGGER                    FIRST SOUND        WHAT STARTS                LOOP CLOSES ON
  +----------------------+----------------------+------------------+----------------------+----------------------+
  | KICK-FIRST           | audio threshold        | kick from mic    | session + metronome  | downbeat             |
  | HARMONY-FIRST        | tap-to-start           | piano (1 cycle)  | metronome in ear     | end of harmonic cycle|
  | AUTO-GROOVE          | Looperator engaged     | bare kick + groove| Looperator from t=0 | with first phrase    |
  +----------------------+----------------------+------------------+----------------------+----------------------+
METHOD 1
Kick-first
Audio threshold recording. He sets a level threshold on the input. The moment he hits the kick into the mic,
Loopy detects the transient, starts the session, fires the metronome, and the loop closes on the next downbeat.
Most direct path from silence to a moving track.
METHOD 2
Harmony-first
Tap to start, metronome goes into the in-ear monitor, he plays piano for one cycle,
then closes the loop on the bar line. Used when the set wants to open with a harmonic statement before any drums exist.
METHOD 3
Auto-groove
Looperator engaged from start. A bare kick becomes interesting immediately because Looperator
adds subtle groove to it from the first hit. Lazy-start that doesn't sound lazy.
3.6 Signal flow synthesis - how the drum brain actually wires up
Putting all five sub-mechanisms in one picture: the live backbone, the baked top, the Looperator mutator, the fill arsenal, and the session-starter.
                              KRISTOF7S DRUM ENGINE
   ___________________________________________________________________________

      MIC (kick + snare from mouth)
         |
         v
   [ LIVE LOOP - kick+snare backbone ]----+
                                          |
      STEP DIAL  -->  [House|DnB|Swing|Aggressive|...]  selects pack
                              |
                              v
   [ PRE-PRODUCED TOP LOOP COLUMN ]  (hi-hats, perc, crashes, cymbals)
                              |
                              +--------+
                                       |
                                       v
                              [  LOOPERATOR  ]  re-slice / auto-groove / half-time / jungle
                                       |
                                       v
                              [ DRUM BUS SUM ]
                                       |
              +------------------------+------------------------+
              |                                                 |
       +--------------+                                  +--------------+
       |  AMEN BREAKS |  on buttons                      | FILLS+RISERS |  on buttons (toms, snare slicer, buildups)
       +--------------+                                  +--------------+
              |                                                 |
              +------------------>  TO MAIN BUS  <--------------+

   SESSION STARTERS:
      [1] Kick-first      threshold detect -> start + metro -> close on downbeat
      [2] Harmony-first   tap-start -> metro -> 1 piano cycle -> close
      [3] Auto-groove     Looperator on from t=0 -> bare kick already grooves
Key takeaways - the drum-engine philosophy in 5 lines
Don't loop everything live. Bake the layer that demands tight ghost-note timing; loop the layer that gives the show its identity (kick/snare from your own mouth).
One column, many genres. A Step Dial in front of the top-loop column gives a single button row five drum personalities.
Looperator is the multiplier. A linear loop becomes a generative loop the moment Looperator is on the drum bus.
Every fill is a button, not a pad. Amen, toms, snare slices, risers - all on buttons in various lengths so you grab the one that fits the bar count.
Three starts, three moods. Kick-first for energy, harmony-first for statement, auto-groove for the lazy-but-impressive open.
Section 04 / Compendium
Bass - Color + Neuro (overview)
Kristof's bass section is the loudest design statement in the rig. One purple loop is the only source; everything after it is stacked FX on Loopy buttons. A single button arms a 4-6 plugin chain ("Neuro Bass Generator 2000") that transforms a clean bass into a wobbling, intermodulated, distorted monster. A second button adds a resonator tuned to a chord (the Color Bass trick). The two toggles combine into four flavours from one loop. Resampling, noise XY pad and full plugin recipes live in Part III - this section is the map.
The bass architecture in one picture
PURPLE BASS LOOP   <- single source, recorded once in Loopy
       |
       +---> [ BUTTON A: NEURO chain (4-6 FX) ]   ---+
       |                                              |
       +---> [ BUTTON B: COLOR resonator (chord) ]  --+--> OUT
       |                                              |
       +---> [ GRAY: resample bass to new clip ]    --+
       |                                              |
       +---> [ XY PAD: noise synth, tremolo+bandpass ]+

  Combine A + B independently  =>  4 flavours:
   ( clean )   ( color only )   ( neuro only )   ( color + neuro )
Neuro Bass Generator 2000
One button, 4-6 FX, instant wobble
A single Loopy button arms a chained stack of 4-6 effects sitting after the purple bass loop. Press = enable all; release = disable all (momentary). The same button can be configured tap = toggle, hold = solo.
The chain turns any bass loop into a distorted wobble. The source does not have to be neuro-shaped; the FX stack does the shaping.
Core mechanism = intermodulation. When bass and melody play together, the bass overpowers the melody; when the bass drops, the melody re-emerges through the leftover distortion. This is the entire reason neuro feels so "alive" under a vocal or lead.
Loopy-specific shortcut: the loop is the source. You skip the synth stage entirely. There is no oscillator to design, no neuro reese to construct - the recorded bass loop feeds straight into filter -> distortion.
Reference chain (full recipe in Part III)
The "Neuro Bass Generator 2000" is one Loopy button toggling this 7-stage chain on/off:
Bass loop (purple)
  -> [1] TB Equalizer (+12 dB on 200-2000 Hz band)  or  Mela Volume module
  -> [2] BLEASS Filter (notch, LFO on cutoff, random mode)
  -> [3] FAC Clipper (hard, ~3 dB clip)
  -> [4] BLEASS Filter (bandpass, different LFO rate, slower)
  -> [5] Fosfat (waveshaper character)  or  Turnado distortion preset
  -> [6] BLEASS Multiband Compressor (OTT-style, all frequencies forward)
  -> [7] FAC Clipper or KNOCK (output taming, ceiling -0.3 dBTP)
If you can only afford one cut on a tight iPad: drop the multiband and lean on the second clipper plus a steeper Fosfat.
The bass overpowers the melody when both play. When the bass drops, the melody emerges through the distortion. That is intermodulation, and it is the whole trick.
- Kristof on why the Neuro chain works under any vocal or lead
Color Bass
Bass-as-chord, via a tuned resonator
A resonator is inserted on the bass bus, tuned to a chord = root + 3rd + 5th. The bass then sings like a held chord while still pumping at the original bass rhythm.
The resonator and the neuro chain are toggled independently. That independence is the design point: one purple loop, two binary switches, four playable states.
This is the colour of the section name. "Color Bass" is not a genre label here; it is the specific trick of pitching a tuned resonator into the bass path.
Four flavours from one loop
Neuro
Color
Result
Use case
off
off
CLEAN
verses, breakdowns, anywhere the loop should sit politely
off
on
COLOR
harmonic underbelly under chords, pad-like bass
on
off
NEURO
drops, wobble sections, "the rude one"
on
on
BOTH
huge, sustained, harmonic+distorted - reserved for big moments
Bass-resampling (gray buttons)
Gray = a frozen copy of what the bass just did
The gray buttons resample the bass - they capture the current output of the purple loop (after any FX that are armed at that moment) and store it as a new playable clip.
Gray is wired exclusive to purple. When a gray clip fires, the purple loop stops. This is a Loopy-Pro group-exclusivity setup, not a manual mute.
The point is performative: he can grab a particular flavour (say, "purple + neuro + color, bar 3") into a gray slot, then drop purple out from under it. The frozen variant keeps singing while the live bass is repurposed.
purple = live bass loopgray = resampled snapshotexclusive group
XY Pad for noise synth
One brown pad, two axes, immediate texture
A dedicated XY pad in the template is brown colour-coded - a distinct band in the visual grammar of his template so the eye lands on it instantly.
Axes are mapped to the noise-synth engine:
X = tremolo rate (how fast the texture pulses)
Y = bandpass center (where the noise sits spectrally)
Touch unmutes, release stops. The pad is gestural - sound exists only while a finger is on it. No latching, no fade tail.
Underneath the pad: Dragonfly drives the tremolo engine that XY is steering. Dragonfly is the modulator; the pad is the human surface.
Touch unmutes, release stops. You want the noise to be a gesture, not a section.
- Kristof's XY pad logic, paraphrased
Where this goes next
The overview above is the map. The full method - sound source design, filter movement, distortion staging, the EQ-distortion interaction, and six complete recipes (Classic Neuro, Freeze Neuro, Color + Neuro combo, Reese Pad ambient, Mela mega-chain) - lives in Part III: Bass Design Laboratory. That is where the concrete plugin settings for your arsenal get spelled out.
The track-FX layer is what makes one master template act like five different songs. Every colored bus can route through a chain or bypass it, the chains feed other buses (the move that later enables Clip-to-Zero), and Looperator - Kristof's #1 favorite plugin in the whole rig - gets stacked on itself to spawn "variations of a variation". The whole section is short on paragraphs and long on consequences: this layer is the seed of Sections 6, 7 and the freeze-neuro recipes in Part III.
"What you can do with Looperator inside of Loopy is the best thing ever."
Track effects are per-color, per-bus, bypass-able. Stacked Looperators ride on top. Buses route to buses. That is the entire section in one sentence, but each clause unlocks a different layer of the live set.
Kristof states the section as four bullets. Each one is small in print and large in consequence.
Every color channel can route through track effects or bypass them. The decision is per-channel and live-switchable.
Channels not going through track effects sit "more in background". This is the foreground/background split.
Buses-to-buses routing: a track-FX bus can feed another bus, not just the master. This is the move that enables CTZ (Chapter 7).
Stacked Looperators: a Looperator on top of a Looperator. Stacking presets instead of varying from the original gives him "a variation of a variation".
How the routing actually flows
Each color channel makes one boolean decision: through the track-FX chain, or straight to a bus. Both paths can co-exist live. Buses can in turn feed other buses, which is what later lets the drum bus and the mix bus share the clip-to-zero load (-20 dB each, see Section 7).
Foreground path: channel -> TFX chain -> bus -> (optional) another bus -> master.
Background path: channel -> bypass -> bus -> master. Drier, less present, sits behind.
Bus-to-bus chain: a track-FX bus output is itself a source for another bus's processing. Enables the CTZ drum-bus + mix-bus split.
[COLOR CHANNEL]      foreground                  background
                |                            |
        TFX BYPASS  ?  ----- bypass ON ---------+
                | (off)                      |
                v                            |
        [TRACK-FX CHAIN]                       |
        Looperator / EQ / saturation / etc.  |
                |                            |
                v                            v
              [BUS]  ----- bus-to-bus routing ----->  [OTHER BUS]
                |                                              |
                +-------------------- MASTER <-----------------+
              (CTZ stage lives here - Sec. 7)
Looperator - the #1 favorite
Kristof names Looperator (Sugar Bytes, full price 29,99 EUR) as the #1 favorite plugin in the entire rig. He says it deserves an individual tutorial. It is the beat-slicer, the auto-groover, the fills-machine, the jungle-converter, and on this layer it also gets stacked on top of itself.
"There should be an individual tutorial for Looperator, because what you can do with that effect inside of Loopy is the best thing ever."
on Looperator - Section 3 (drums), reinforced in Section 5
Drum role
Auto-groove from start
Engaged from session start, adds subtle groove to bare kick. One of his three session-start methods.
Stack role
Variation of a variation
Looperator B is fed Looperator A's output. Each preset re-rolls the dice on already-diced audio.
"Variation of a variation" - the stacking mechanic
The default Looperator use is to load a preset and toggle through its variations. Kristof's move is the next layer: instead of always varying from the original loop, he stacks a second Looperator after the first one. The second instance can never know what the first one will spit out, so the result is non-repeating.
[DRUM LOOP]
     |
     v
[LOOPERATOR A]  preset "Auto-Groove"   --> variation 1, 2, 3...
     |
     v
[LOOPERATOR B]  preset "Half-time Jungle"  --> variation 1, 2, 3...
     |
     v
A.var x B.var matrix = "variation of a variation"
     |
     v
[BUS]  ---->  CTZ drum bus (Sec. 7)
The standard Looperator workflow is load preset -> switch variations. Two presets stacked = the variation grid is multiplied.
The stack is order-sensitive: half-time on top of auto-groove is not the same as auto-groove on top of half-time.
Same trick works on post-FX neuro bass: see Part III "Stack Looperator on processed output - chop the neuro into rhythmic patterns" (Recipe Index row 28).
Foreground vs background by routing
Foreground
TFX chain ON
Routed through track-FX: EQ shape, saturation, slicer.
Sits in your face, occupies frequency band.
Eats the headroom set aside in the CTZ stage.
Background
TFX chain BYPASS
Channel bypasses the chain. Dry, untouched.
Sits "more in background" - Kristof's words.
Useful for pads, harmonic beds, support layers that should not fight the lead.
Your-rig map: do you already own this?
The two ingredients of this section: a router that allows per-channel bypass + bus-to-bus (any modern host - Loopy Pro, AUM, Drambo all qualify) and Looperator itself. You already own Looperator, so the stack is a direct copy.
Kristof's tool
Your equivalent
Status
Looperator (Sugar Bytes, 29,99 EUR)
Looperator (you own the full plugin)
Direct match
Per-channel TFX bypass
Loopy Pro bus inserts + bypass toggle on each chain
Direct match
Bus-to-bus routing
Loopy Pro mixer "send to bus" + bus output as next bus's input
Direct match
Stacked Looperators
Two Looperator instances in series on the same drum or bass bus
CPU-cost watch
What this layer unlocks downstream
This section is short on the page and load-bearing for the rest of the doc. Three later mechanics depend directly on the bus-to-bus + bypass-per-channel + Looperator-stack pattern set here.
Section 7
CTZ bus split
Drum bus and mix bus both clipped to -20 dB - only possible because TFX buses can feed buses.
Part III · Recipe 2
Freeze Neuro -> Looperator
Step 4: Looperator on gray -> chop into rhythmic patterns. Direct stack on the frozen bass print.
Recipe Index row 28
Stack on processed
"Stack Looperator on processed output - chop the neuro into rhythmic patterns" - this is the same mechanic on a post-FX print, not the raw loop.
Section 3
Auto-groove start
Looperator engaged from session start: bare kick gets a subtle groove because the TFX layer is already live.
The mixer layer in the wild
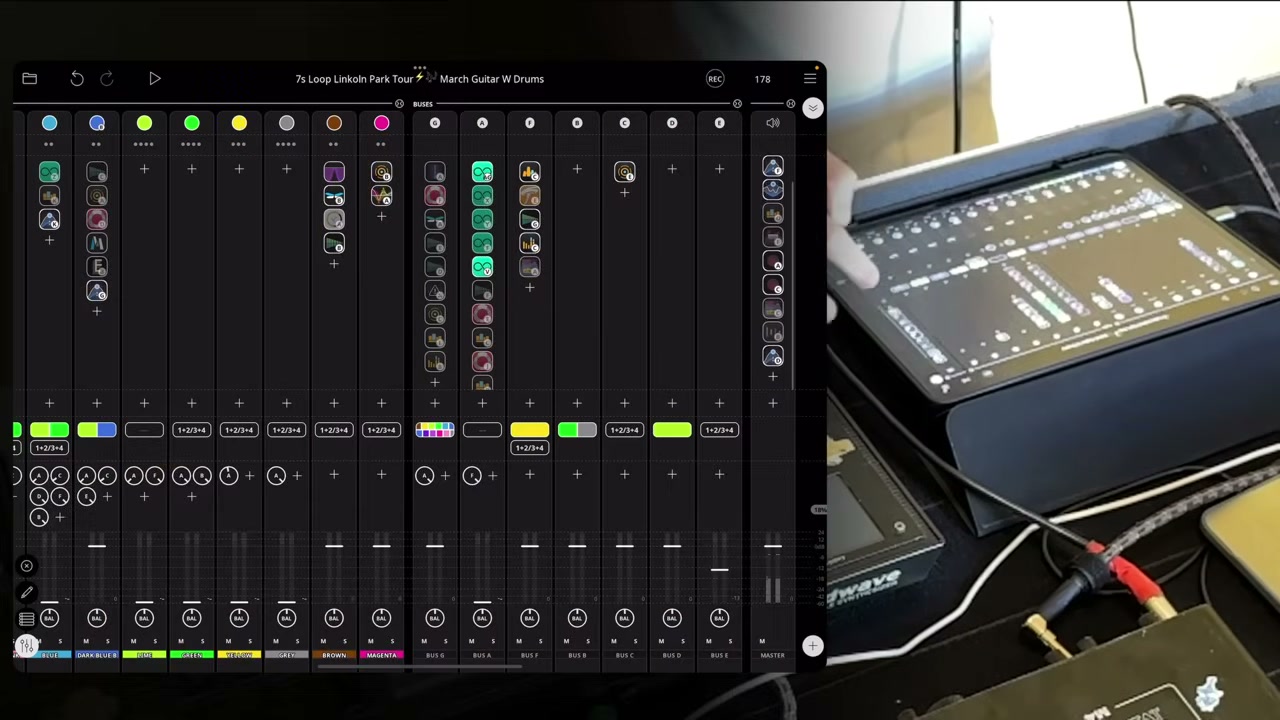
whf-J9 01:38:30 - Loopy Pro AUv3 mixer with audio inputs and colored bus columns. The TFX layer lives on these columns: every color decides whether it routes through its chain, every bus can feed another bus, and Looperators stack inside the chains. This is the entire Section 5 in one shot.
Section distilled
Layer
Per-color TFX bus
Every color channel: through or bypass.
Split
Foreground / background
Routed = forward, bypassed = behind.
Routing
Bus -> bus
Seed move for CTZ in Sec. 7.
Star plugin
Looperator
#1 favorite, Sugar Bytes, 29,99 EUR.
Trick
Stacked Looperators
Variation of a variation. Order matters.
Section 06 / Compendium
Sidechain via Flux Mini 2
Kristof builds his pump with a free plugin and runs 2-3 instances at once, one per drum pattern, so the sidechain auto-switches when he flips kick patterns. The same plugin doubles as his latency probe for every other plugin in the rig. Two jobs, zero euros, one tool.
The tool
Flux Mini 2free AUv3runs on iPadused 2-3x in parallelpreset-switchable per kick pattern
A free LFO/envelope-shaper AUv3 from Caelum Audio. Kristof's stack proves the point: production-grade pump does not require a paid sidechain compressor. He pays for nothing here and ships it on stage.
Sidechain compression
How the multi-instance trick works
2-3 Flux Mini 2 instances sit ready in the template, each with a stored envelope shape matched to a specific kick pattern.
When Kristof changes the drum pattern, the sidechain preset auto-switches with it - the pump-curve always lines up with whatever the kick is doing at that moment.
This is currently tied to fixed kick patterns, not to MIDI input. The duck shape is baked into the envelope.
Wishlist (Kristof + Michael confirmed feasible): MIDI-triggered sidechain, where the duck fires off an actual kick MIDI note instead of a stored shape. Future feature, not yet shipped.
The five sidechain presets
One preset per kick pattern. The drum pattern picker effectively becomes a pump-style picker.
Four-on-the-floorDubstep (kick on the one)Kick + snareEighth-note pumpingTrap
Pattern
Pump shape
Where it lives in his set
Four-on-the-floor
Classic quarter-note duck, full pump on every kick
House / techno mid-tempo cuts
Dubstep (one)
Single duck on beat 1, lets the half-time groove breathe
Half-tempo / dubstep drops
Kick + snare
Twin ducks on 1 and 3 plus offbeats - two-pulse pump
Breakbeat, DnB-leaning sections
Eighth-note pumping
Fast 1/8-note pulse - rhythmic gating feel
Driving electronic builds, trance-style
Trap
Asymmetric duck matched to trap kick spacing
Trap / hip-hop derived sections
The sidechain follows the kick. I change the drum pattern - the pump changes with it. No re-wiring, no menu diving, just the right shape on the right groove.
- Kristof's stated logic for the multi-instance preset stack
Flux Mini 2 as a latency test tool
Same plugin, second job. Because Flux Mini 2 displays its envelope on a visible grid synced to the host clock, you can read plugin latency off it by eye. Place it after a suspect plugin, play a drum loop, and watch where the kick lands relative to the grid.
The probe procedure
Insert Flux Mini 2 in the signal chain after the plugin you are testing.
Set the display to 1/8 note resolution on the grid.
Play a drum loop through the chain. A clean kick should land exactly on the downbeat.
Read the shift: any visible offset from the downbeat is the latency that plugin introduces.
Switch to 1/16 grid divisions for finer resolution - the ms value is then estimable from the BPM.
Compare against the target: under 10-12 ms total across the whole chain. Above that, the rig starts feeling sluggish on stage.
SIGNAL CHAIN (latency probe mode)

  [ drum loop ]
        |
        v
  [ suspect plugin ]   <- the one whose latency you want to measure
        |
        v
  [ Flux Mini 2 ]      <- 1/8 grid display, watch the kick position
        |
        v
  [ out ]

  downbeat grid:  |    |    |    |    |
  kick lands:     |    |  *=                    <- shift = added latency
                          ^ this offset is what the plugin cost you
BPM to ms cheat (1/16 grid)
BPM
1/16 note duration
1/2 of 1/16 (visible offset)
120
125 ms
~62 ms shift = clearly over budget
140
107 ms
~54 ms shift
170
88 ms
~44 ms shift
A shift of less than 1/8 of a 1/16 grid square at 120 BPM is roughly in the 10-12 ms budget. Rule of thumb: if the eye can see the offset, you are probably already past the target.
Why this matters in Kristof's rig
He runs the whole show off an iPad. Every plugin in the chain spends a few ms of his latency budget. Flux Mini 2 turns a normally invisible spec sheet number ("plugin X reports N samples of latency") into a live, visible offset on a grid - which is what your hands actually feel when you trigger a loop. The 10-12 ms total ceiling is the gate; anything slower than that and the rig stops feeling playable.
Drop it after the plugin, play a kick, look at the grid. If the kick is not on the downbeat, that is your latency. Free measuring tape.
- Kristof's free-plugin latency hack, paraphrased from the workflow
PART 7 / CHAPTER OF RECORD
Clip-to-Zero Mastering
CTZ - the loudness chain Kristof built inside Loopy Pro
Kristof's single most important mixing breakthrough. The chain is inspired by a 17-video YouTube series on the clip-to-zero method (channel name forgotten). On drums + bass it reaches -5 to -6 LUFS - commercially competitive loudness, generated entirely inside Loopy Pro on iPad. It is purpose-built for heavy electronic music; it is explicitly not for jazz, blues, or solo guitar.
Target -5 to -6 LUFS (drums + bass)Topology Drum bus + Mix bus + Master, load sharedClip ceiling -20 dB per sub-busLatency Zero (soft/hard clippers, no lookahead)
"Search for clip-to-zero method - you'll find this guy having like 17 two-hour videos. I really recommend watching at least a couple to open your mind."
- Kristof, whf-J9 ~01:40
"Don't do this for jazz, blues, or just guitar. This is set up for heavy electronic music where you want to be in the face, aggressive."
- Kristof, scope warning
7.1 The Bus Structure
Three processing layers feed each other. Each layer carries a fraction of the clipping work so no single stage has to distort hard. The principle: share the load.
// CTZ topology - Kristof's Loopy Pro routing
TRACK INPUT ───► [ SOFT/HARD CLIPPER ] ◄── zero-latency transient catcher
│
┌──────────────────┼──────────────────────┐
▼ ▼
DRUM BUSMIX BUS (bass + harmony + leads + acapellas)
Knoc Clipper Barricade (limiter / compressor / clipper)
ProL (meter only) ProL (meter only)
clip to -20 dB clip to -20 dB
│ │
└────────────────┐ ┌──────────────┘
▼ ▼
MASTER
Soft Clipper + Hard Clipper (hard = bypass for jazz)
ProQ4 mid/side EQ
ProL 2 (GAIN +19.9, meter only)
│
▼
OUTPUT (-5 to -6 LUFS)
Stage by stage
Input stage - a soft / hard clipper sits as the first plugin on each track. Zero latency. It catches transient peaks before they bloom into the bus, freeing headroom without audible distortion.
Drum bus - Knoc Clipper does the actual clipping work. ProL sits after it as a metering layer only (processing disengaged - it's there for visual reference, not gain reduction).
Mix bus - everything that isn't drums (bass + harmony + leads + acapellas) hits Barricade, a multi-mode plugin used here as limiter / compressor / clipper. Same idea: ProL after Barricade as a meter, not a processor.
Master - two clippers stacked: a soft clipper and a hard clipper. The hard one can be bypassed for jazz gigs while keeping the rest of the chain intact.
Sub-bus ceiling - drum bus and mix bus both clip at -20 dB. That's the load-sharing trick: each bus does part of the limiting, none of them has to be brutal about it.
"When you share the load, each individual is not gonna cause that much distortion. So when you share the load you kind of increase clarity and still get crazy LUFS numbers."
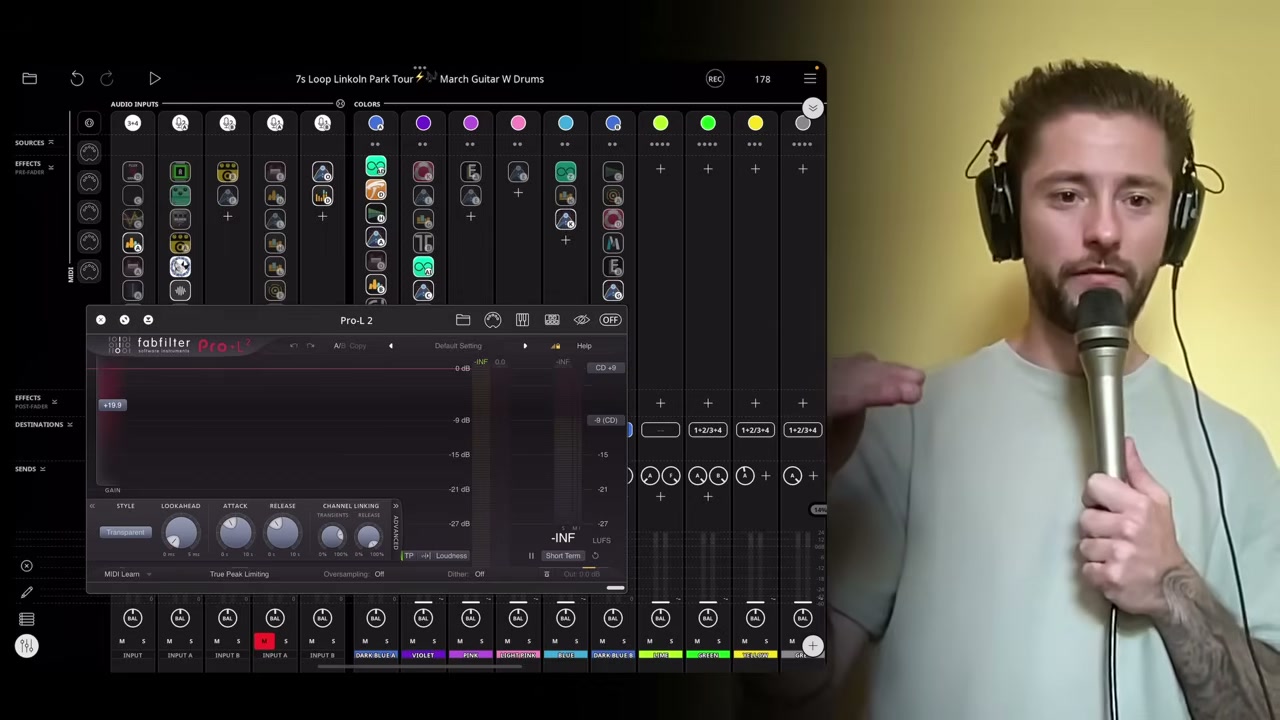
Pro-L 2 appears twice in the chain - on the drum/mix busses as a meter (processing OFF) and on the master where it does actual limiting (GAIN +19.9 visible in his screenshot).
whf-J9 · 01:46:00 Loopy Pro mixer with the CTZ routing layer fully visible. Coloured bus channels (blue, white) carry the drum-bus and mix-bus split before they sum into the master.
7.2 Master Chain
The master is more than just two clippers. EQ shapes the bottom and the harsh band before limiting, and a performance gesture rides on top.
FabFilter ProQ4 as the master EQ. Run in mid/side mode. Used for:
gentle saturation (the "warm" setting)
a deliberate 30 Hz sub bump to make low-end feel present on club rigs
side-cut in the harsh-frequency band - de-essing the stereo image without dulling the centre
DJ-style filter sweep on the master EQ, mapped to fire in sync with the crash. So when the crash hits, the whole mix sweeps - a performance gesture baked into the mastering chain.
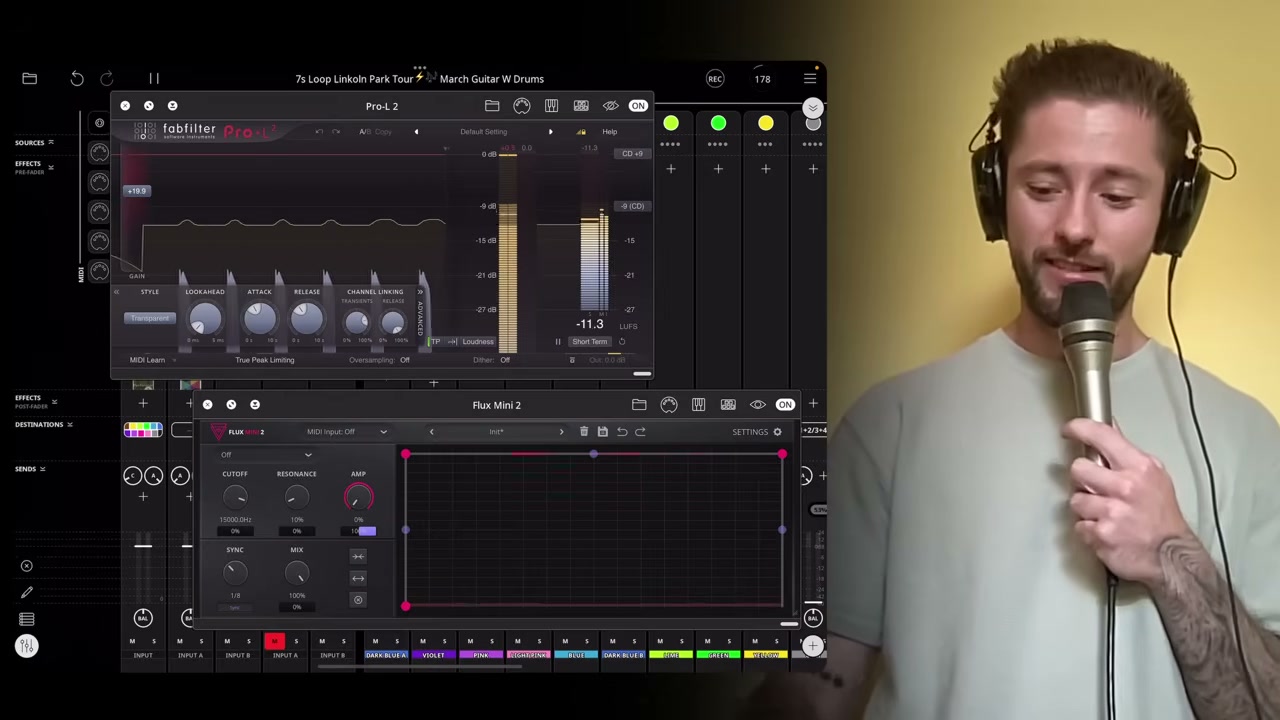
FabFilter Pro-L 2 after EQ. In Kristof's capture GAIN +19.9 is dialled in - that's how much extra loudness the master limiter is squeezing out on top of the already-clipped busses. The loudness meter is visible right inside Loopy Pro.
whf-J9 · 01:42:00 Pro-L 2 open over the Loopy clip grid - the metering instance (processing disengaged). On the sub-busses Pro-L 2 only watches.
whf-J9 · 01:56:00 The master Pro-L 2 with GAIN +19.9 visible - this is the limiting stage that pushes the already-clipped sum into commercial LUFS territory.
Bus-by-bus reference card
Stage
Plugin(s)
Role
Setting / ceiling
Track input
Soft / hard clipper
Transient catch, zero latency
no lookahead
Drum bus
Knoc Clipper + Pro-L 2
Clip; Pro-L metering only
-20 dB ceiling
Mix bus bass + harmony + leads + acapellas
Barricade + Pro-L 2
Limit / compress / clip; Pro-L metering only
-20 dB ceiling
Master EQ
FabFilter ProQ4
Mid/side EQ + warm saturation + 30 Hz sub bump + side-cut on harsh band; DJ-filter swept on crash
mid/side mode
Master clip
Soft + hard clipper (stacked)
Final ceiling control; hard stage bypassable for jazz
hard = toggle
Master limit
FabFilter Pro-L 2
Final loudness push, visible loudness meter
GAIN +19.9
Why share the load
Each clipper only has to do a fraction of the total limiting work.
Distortion stays under the audibility threshold at every individual node.
Net effect: competitive LUFS without smearing transients into mush.
Clarity goes up because no single stage is being asked to do the impossible.
Use cases - in / out
USE heavy electronic, in-your-face, club-loud material
USE drum-and-bass focused mixes targeting -5 / -6 LUFS
SKIP jazz - dynamics matter more than ceiling
SKIP blues, solo guitar - clipping ruins the tone
TWEAK for hybrid sets: bypass the hard clipper on the master only
Practical notes
Clippers are zero-latency. The chain never adds round-trip delay - critical on a live looping rig.
Pro-L 2 is metering-only on sub-busses. Don't let its presence fool you - the actual clip work is upstream.
The 30 Hz bump on ProQ4 is club-system glue, not subbass loudness - it sits inside the mid/side EQ already shaping the side image.
The crash-linked filter sweep means the master is partly a performance instrument, not just a mastering bus.
The CTZ chain is the difference between an iPad rig that sounds like an iPad and an iPad rig that competes on the floor with a laptop-Ableton DJ set. Two sub-busses, one master, six plugin slots, and a -20 dB ceiling. That's the whole secret.
Three deceptively simple tricks - one finger on a Press-and-Release pad, a four-flavor mute palette, and a crash sample fired on every section change - are how Kristof turns a static clip grid into a DJ-grade arrangement engine. None of these need extra plugins: it is action-list choreography, plus one well-recorded riser, plus a single crash one-shot. The economy is the point.
SIGNATURE MOVE
Press-and-Release Buildups
One pad. Press to ramp the room into tension, release to slam it open on beat 1 of the next section. Every effect, EQ move, automation slider, and sample fires from the same Loopy Pro Action List - which is why it stays in time even when you are singing or speaking into a mic.
What "Press" engages, simultaneously
DelayLow-cutStereo narrowingCrash on the oneProQ3 EQ cut (sub + harsh side)Transit slider, 4-bar rampPre-recorded drum-roll loop
The Transit slider on a 4-bar ramp is the riser. Kristof does not load a separate Riser plugin: the slider sweep IS the riser, with the EQ cut and stereo narrowing doing the "drain the air out of the room" work that a producer normally writes in a DAW.
What "Release" restores
Full frequency range - sub returns, top end returns
Full stereo width - the narrowed mono collapses outward
Direct sound - the delay tail decays, the room comes back dry
The crash on the one is already hitting before the listener consciously registers the release
The singer escape hatch
Fixed-length pre-recorded buildup loops only work when you know the bar count in advance. The moment a vocalist starts riffing, you do not. Kristof's fallback: a static snare roll - flexible-length, hold-as-long-as-you-need - that lets the buildup stretch to wherever the singer lands.
whf-J9 00:45:00 The Action List inside one Loopy Pro button. Every line in this list runs on the same press - this is how seven effects fire as one move.
PALETTE
Mute Combos - The Four Flavors
Instead of muting individual clips one by one mid-set, Kristof keeps four pre-grouped mute states as one-tap pads. This converts arrangement decisions into single-finger gestures and makes drop/breakdown geometry instant.
Flavor
What stays audible
Typical use
Full drum mute
Everything except the drum bus
Pure breakdown - melody, bass, vox carry the room
Kick + HH only
Drum skeleton (no snare, no top)
Verse-into-pre or "tease the drop" zones
Snare + top only
Anti-skeleton (no kick, no body)
Pumping breakdown, half-time illusions
Everything except drums
Full drum kit, no melodic/harmonic layer
Pure rhythm break - DJ-style isolation
whf-J9 01:04:30 The visual feedback that makes the system playable: dimmed clips on the right show exactly which channels are silenced, so the next move is never a guess.
EVERYBODY NEEDS THAT
Crash Cymbal on the One
"Game changer, everybody needs that."
- Kristof7s
A single crash cymbal hit, fired exactly on the first beat of the new section. It is not a fill, it is not a transition - it is the punctuation mark that tells the listener "we have arrived". Three deployment rules:
A crash exactly on the first beat of the new song / new section
Integrated into fills, mutes, and buildups - never a standalone trigger
Fires on every section change, not just the big ones
Why it works: the crash arrives before the listener's brain has finished parsing the release. The combination - press-release lifts tension, mute combo reshapes the bed, crash punctuates the arrival - is what makes the transition read as a DJ cut, not a Loopy session.
The Compound Move
All three elements stack on one pad press. The signal chain reads top-to-bottom in time, even though everything fires at once:
One button. Seven actions. Zero hands free to do anything except sing into the mic or play the Modwave. This is the entire "DJ replacement" thesis compressed into a single Action List.
Section 09 / Vocal Layer
Acapella System
A four-rule mechanism that lets Kristof drop entire songs (Linkin Park, anything else)
over the live rig without breaking flow. The whole vocal layer rides on
two existing template primitives (Step Dial + Follow Actions),
a single playback gesture (double-press), and a
two-source library (AI-separated acapellas + self-recorded vocals).
No extra signal chain, no extra rules. It is the smallest section in the master template
because it reuses everything else.
The four rules, verbatim
How an acapella gets on stage
01
Step Dial selects an acapella
The same Step Dial primitive he uses for drum preset packs (House / DnB / Swing / Aggressive) and for cycling lead presets. One control, dialed through the song library.
02
Double-press plays it
Single tap is reserved for primary actions across the template; double tap is the secondary slot in his gesture lexicon. Acapella playback sits on that slot so a single fader hand can both choose and fire.
03
Follow Actions auto-advance verses
Verse 1 -> Verse 2 -> Hook, hands-free. He never re-arms the next chunk; the loop closes on the previous verse and the next slot fires itself. Same primitive as his drum-pattern auto-advance chains.
04
Two source types feed the library
AI-separated acapellas (commercial tracks de-mixed into a clean vocal stem) sit next to self-recorded vocals in the same dial. Cover and original treated as one pool.
Signal flow + control flow
  CONTROL FLOW (left hand, one Step Dial widget)
  ----------------------------------------------
   [ Step Dial ]   rotate to select song
        |
        v
   [ Double-press ]   fire selected acapella
        |
        v
   [ Follow Action chain ]   Verse 1 -> Verse 2 -> Hook
                              (auto-advances, no re-arm)


  SIGNAL FLOW (the audio path the verses ride on)
  ----------------------------------------------
   [ Acapella clip ] --(LIGHT-BLUE channel: leads / vocals / lead lines)-->
   [ Track FX, optional ] --> [ MIX BUS ] --> Barricade + ProL ( -20 dB )
                                                            |
                                                            v
                                                  [ MASTER soft + hard clip ]


  SOURCE LIBRARY (Step Dial points into this pool)
  -----------------------------------------------
   pool A:  AI-separated acapellas  (track de-mix)
   pool B:  self-recorded vocals    (his own takes)
   -> same dial, same gesture, same Follow Action chain
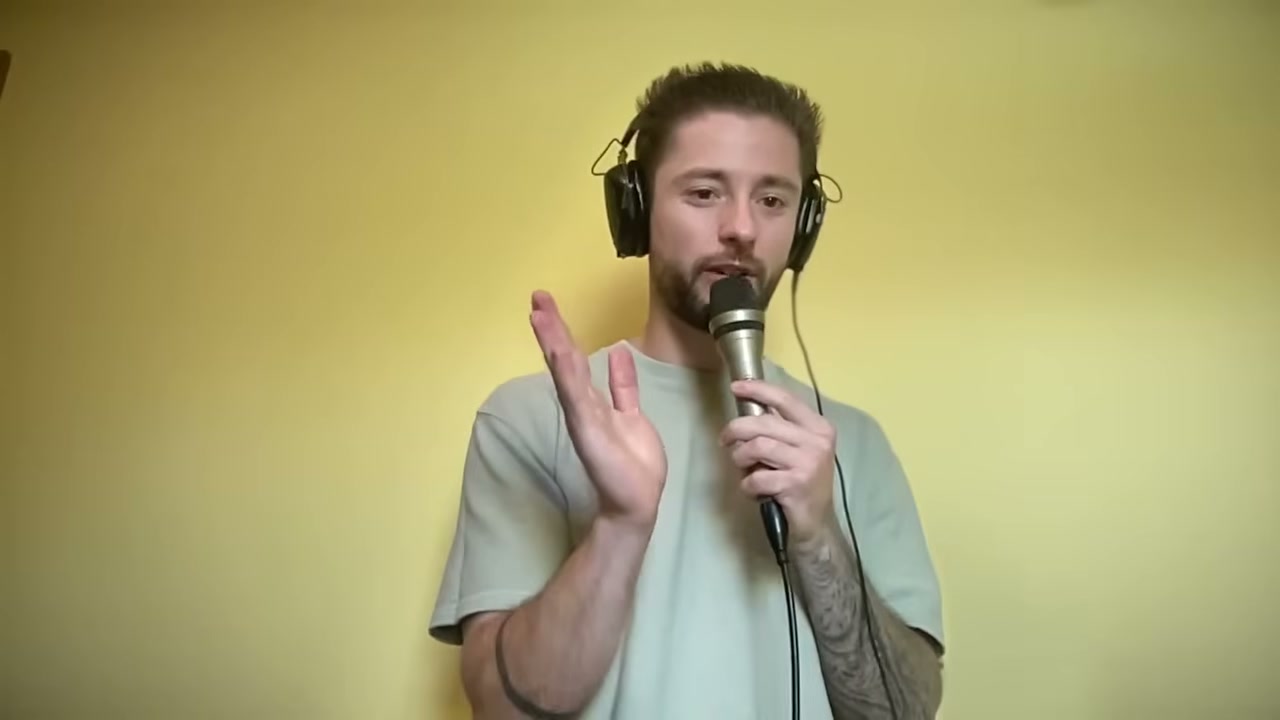
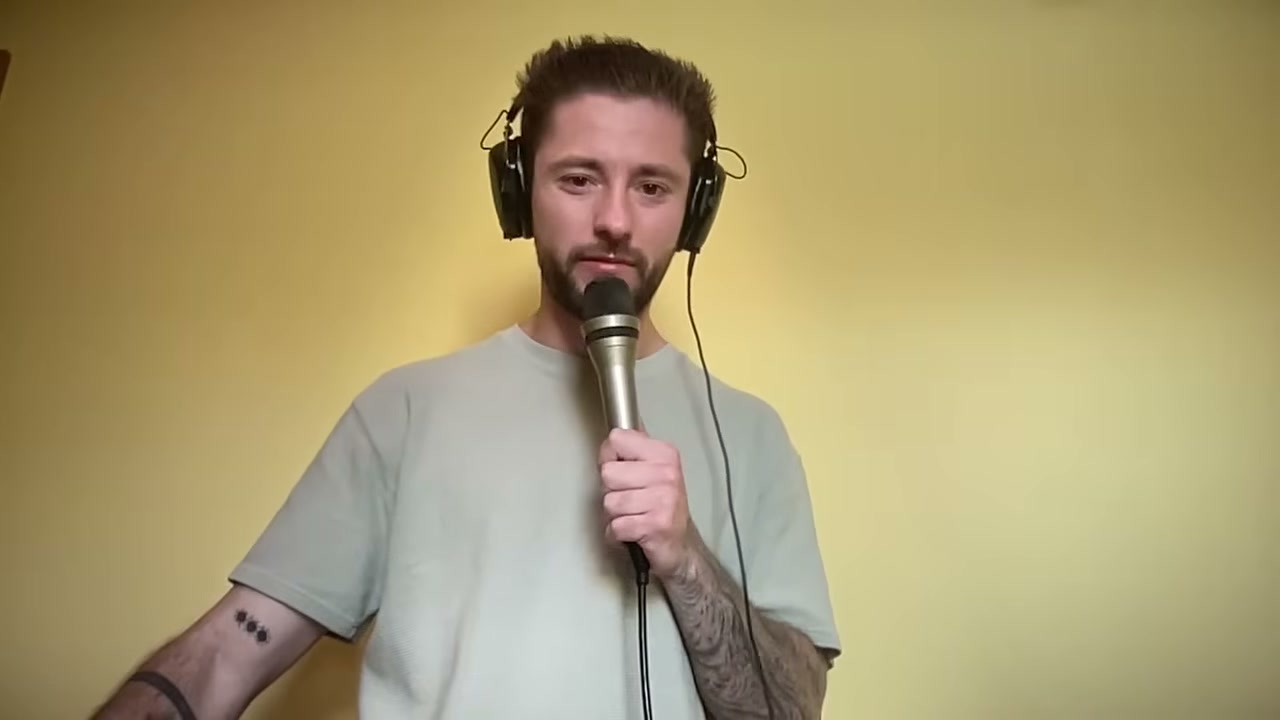
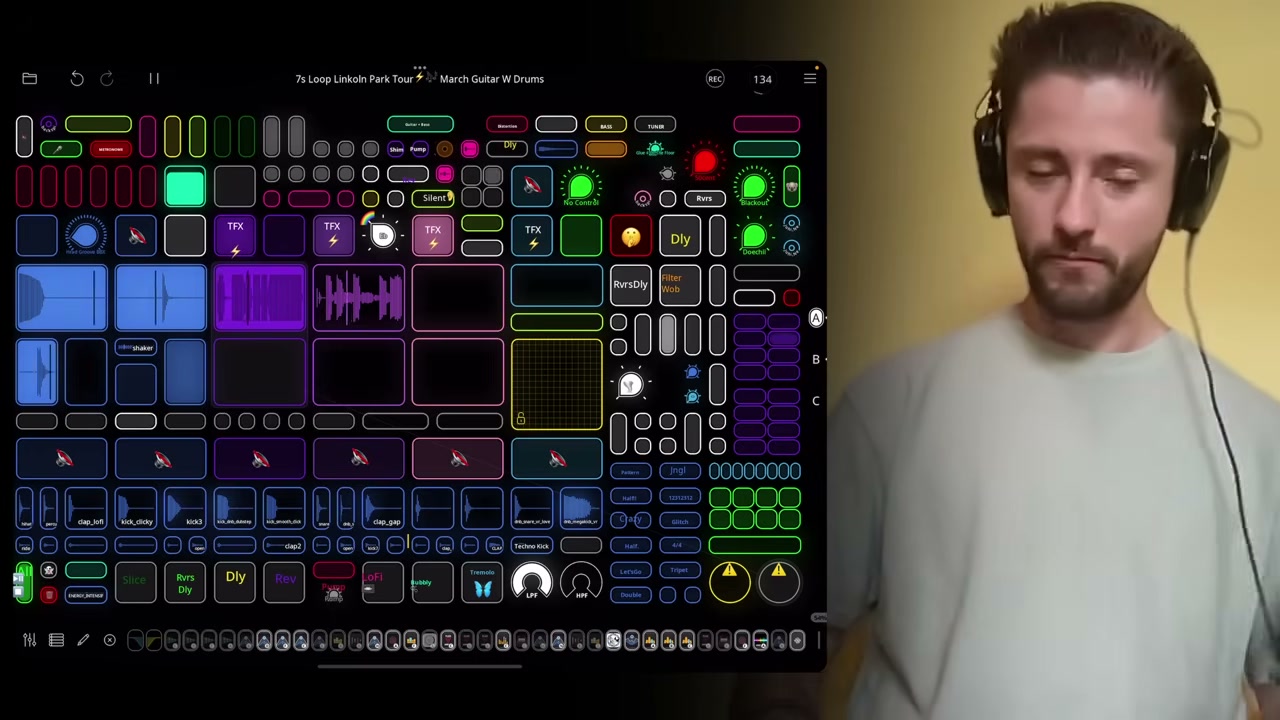
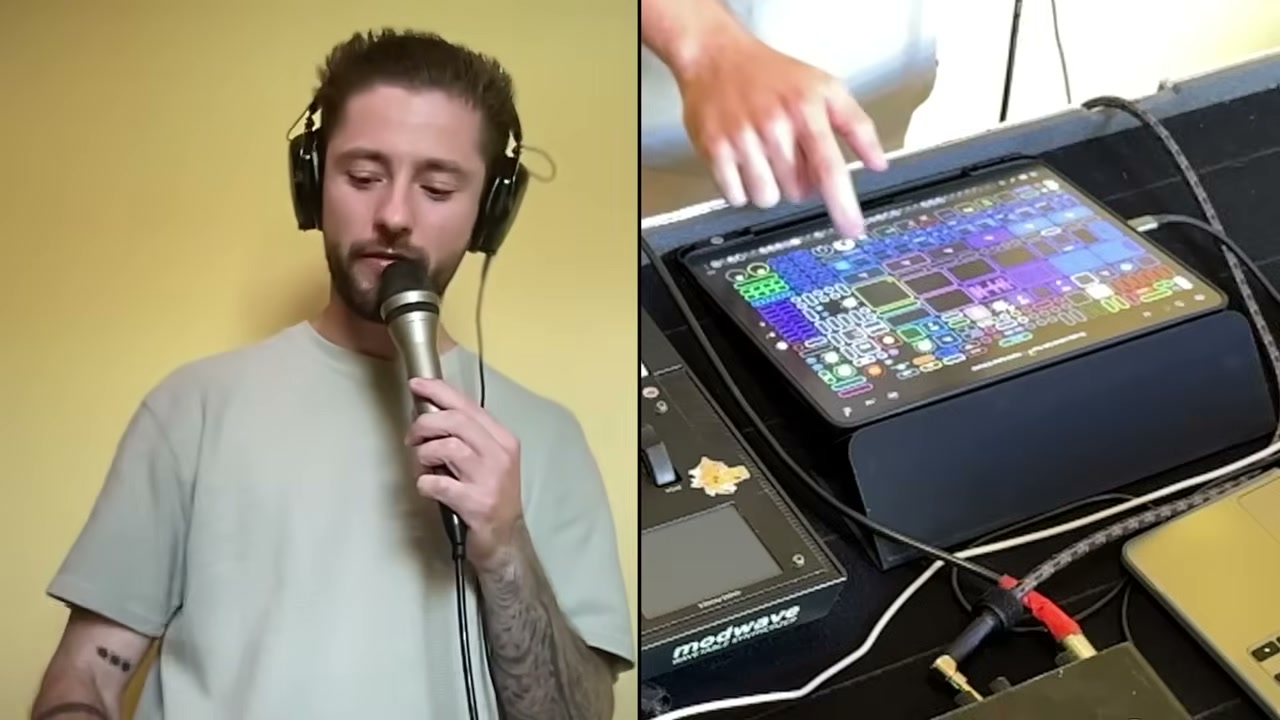
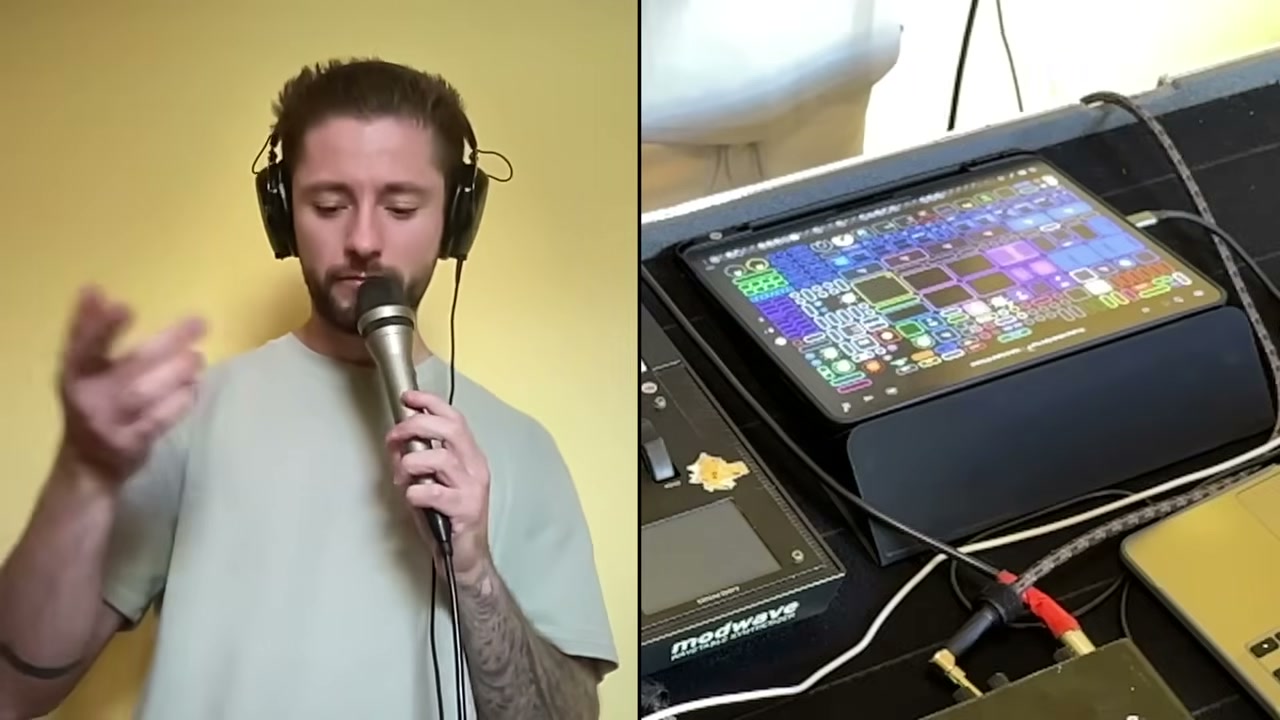
The vocal layer in context: Kristof on the mic (left), the iPad sitting on top of the Modwave (right). The Step Dial that fires verses lives on the same iPad surface.
"I'm not a gatekeeper" - his stance on the template applies to the vocal system too: explained by concept, never handed over as a preset pack.
Cross-reference: where the acapella plugs in
Three template hooks the vocal layer reuses
Color-code hook
Light blue = Leads, Vocals, Lead Lines. The acapella clips live in the same color channel as melodic leads, so the mixer treats both with one set of moves.
Gesture hook
Acapella sits on double-press (= secondary). Same gesture grammar as the rest of the template: one button, many actions.
Bus hook
Verses sum into the Mix bus alongside bass + harmony + leads, hit Barricade clipped to -20 dB, then the master soft + hard clippers. (See section 7.)
Two source types, same dial
Aspect
AI-separated acapella
Self-recorded vocal
Origin
Commercial track de-mixed into a clean vocal stem (e.g. Linkin Park).
Kristof's own takes, captured before the show.
Slot in dial
Same Step Dial pool.
Same Step Dial pool.
Fire gesture
Double-press.
Double-press.
Advance
Follow Actions chain: V1 -> V2 -> Hook.
Follow Actions chain: V1 -> V2 -> Hook.
Channel color
Light blue (leads / vocals)
Light blue (leads / vocals)
Downstream
Mix bus -> Barricade @ -20 dB -> Master soft+hard clip.
Mix bus -> Barricade @ -20 dB -> Master soft+hard clip.
The point of the table is not the differences. It is the absence of differences: AI stems and self-recorded vocals are deliberately not distinguished at the control surface, so live decisions never have to branch.
Why the Step Dial owns the song library
Step Dials elsewhere in the template
The Step Dial primitive is not a vocal-only widget. Kristof uses it as the universal "rotate-and-pick" control across the rig. The acapella system simply borrows the family:
"One button can do so many things with different interaction modes -
that's a game changer."
Why this section is short
Four bullets is the whole spec. The acapella system has no dedicated plugins, no dedicated bus, no dedicated effect chain - it
re-uses three primitives the master template already owns: Step Dial (drums / leads), double-press (gesture lexicon), Follow Actions (auto-advance). The economy of the system is the system. Adding a vocal layer cost him nothing structurally; it cost him a library and a dial slot.
Section 10 / Hardware
Korg Modwave: The Hardware Star
The one piece of physical kit Kristof refuses to remove from the rig. Wavetable synth, three-zone keyboard map (texture row, bass row, chord row), Chaos Pad on top - and crucially, wired to the iPad as audio only. Loopy never sees a MIDI note from it. It records the sound, then chops, loops, mangles. Hardware as a sample source, not a sequencer slave.
His favorite gear.
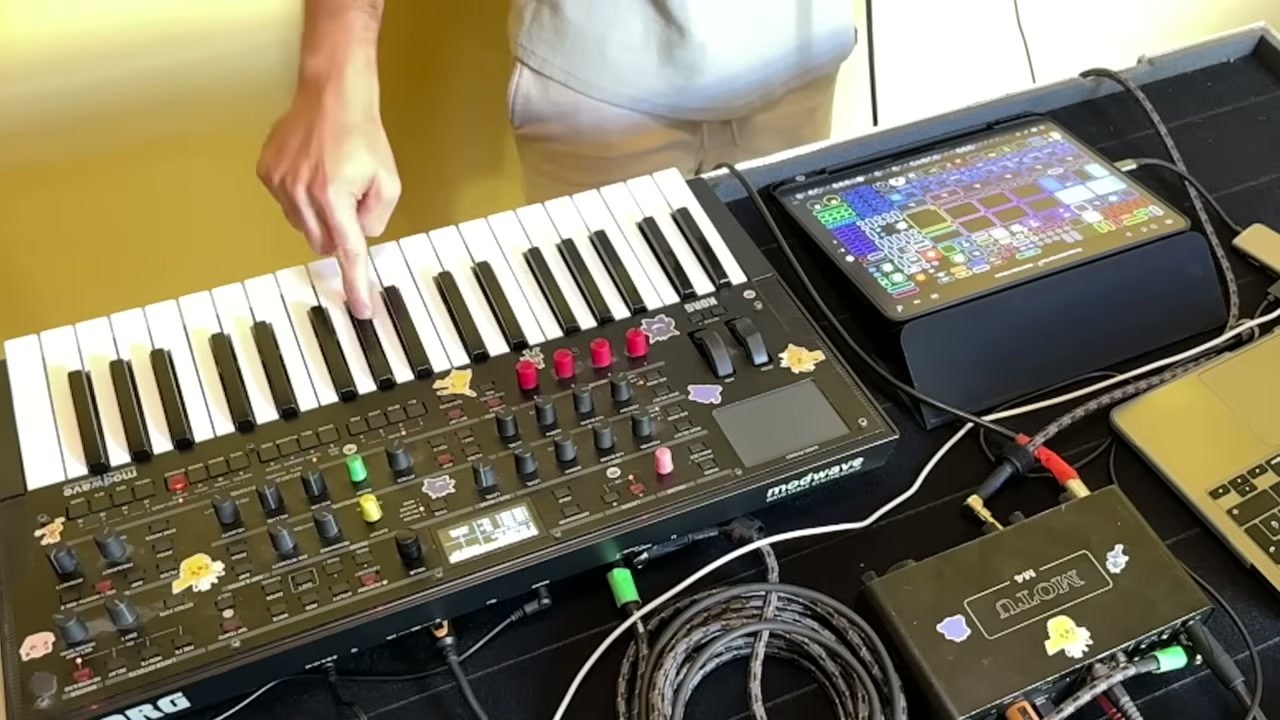
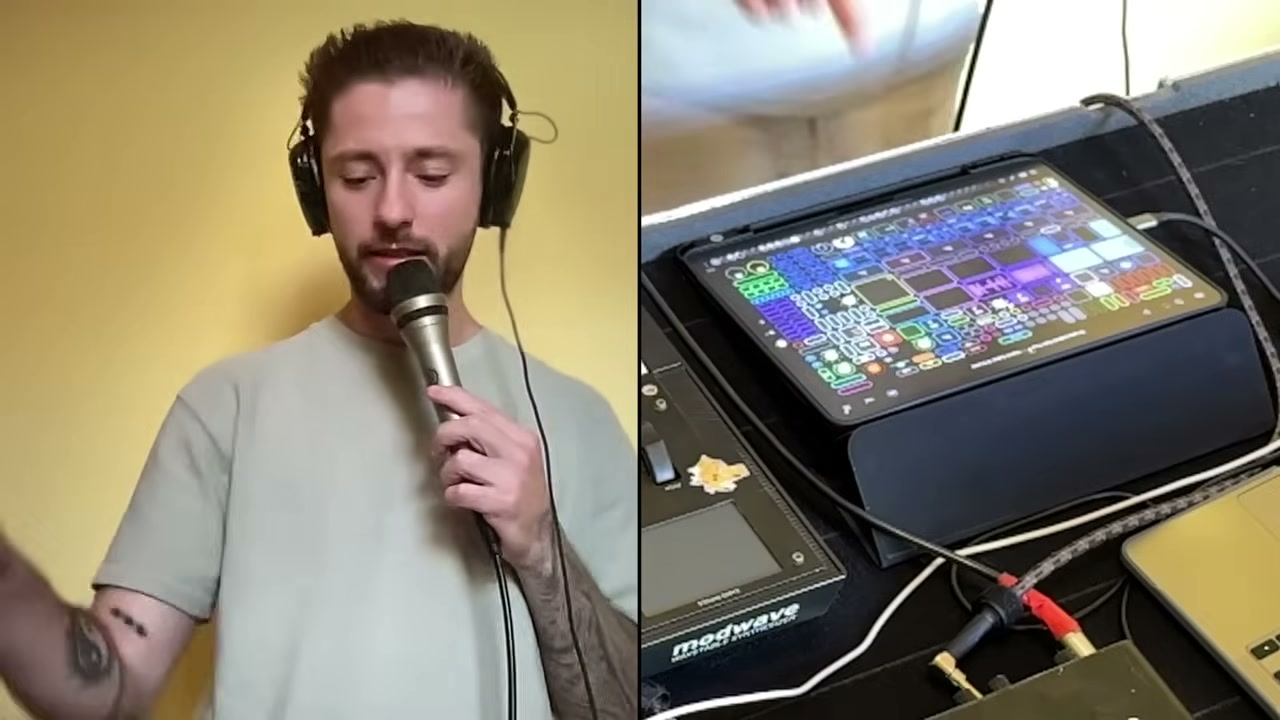
whf-J9 00:59:00 Top-down: the Modwave centerpiece, iPad with Loopy session, audio cabling visible.
What it does
A wavetable synth that Kristof treats as hardware Serum - but where the Serum logic gets pushed out into the keyboard layout itself. The patch he plays from is built so the keys do three different jobs depending on which octave you hit.
Wavetable engine - "like hardware Serum". Full wavetable scrubbing on the front panel, no laptop required.
One octave = same bass note, different textures - the patch is layered so a single octave gives you the same pitch with different wavetable positions / samples mapped key-by-key. Walk up the white keys, same root, different timbre. Loopy records the texture you want, on the pitch you want, in one gesture.
First octave = chords correlated to the key - the bottom octave is not single notes. Each key fires a full chord that fits the session key. One-finger harmonic pads.
Chaos Pad on the front panel for real-time manipulation - the XY surface drives wavetable position, filter, FX in performance. This is the live-mangling layer that you cannot get from an AUv3 synth without dedicating an external MIDI controller.
How he connects it to the iPad
This is the design choice that defines the whole hybrid rig. Read it twice:
Connected via audio - NOT MIDI to Loopy.
Loopy records the audio output of the Modwave, then processes it further - clip reverse, Looperator slicing, Turnado mangling, the whole AUv3 chain downstream.
 Modwave keys + Chaos Pad
 (wavetable + chord layer + texture layer)
            │
            │  AUDIO OUT (1/4" jacks, no MIDI cable to iPad)
            ▼
 iPad audio interface input
            │
            ▼
 Loopy Pro input channel  ─►  RECORD into clip
            │
            ▼
 AUv3 chain: Looperator / Turnado / Flux Mini 2 / CTZ bus
            │
            ▼
 Loopy mixer + master + speakers
Why this matters: Loopy never has to sequence the Modwave, the Modwave never has to obey Loopy. They run on independent timing surfaces - Kristof's hands handle the sync. The Modwave is treated like a vocal mic that happens to be a synth: you sing into it, Loopy captures the take. No DAW transport coupling, no MIDI clock drift, no patch-change latency.
The three-zone keyboard map
One patch, three jobs - that is the unlock. Most iPad-only setups need three separate AUv3 synths or three MIDI tracks to do what one Modwave patch does in hardware:
Zone
What it fires
Loopy role
Bottom octave
Chords correlated to the session key (one key per chord)
Harmonic pad layer, recorded as audio clip
Middle octave
Single bass note, but each key = different wavetable texture on the same pitch
Bass-as-sample-source - record the texture, drop it on a loop
Chaos Pad (above keys)
XY real-time wavetable / filter / FX manipulation
Live-mangling during record - print the gesture into the clip
whf-J9 01:18:30 Wavetable position visible on the front-panel display. The Chaos Pad sits to the right of the screen.
Why hardware, not an AUv3
Kristof owns a maxed-out iPad and uses heavy AUv3 stacks elsewhere in the rig. The Modwave stays because it solves three things software cannot match on this iPad:
Zero plugin CPUTactile Chaos Pad37 keys of muscle memoryAudio-in path, not AUv3 host slotPre-coded patch logic
CPU offload - wavetable synthesis happens in the Korg's DSP, not in Loopy's audio thread. The iPad keeps its headroom for Looperator, Turnado, KNOCK, FAC Clipper, the CTZ bus chain.
Physical Chaos Pad beats any on-screen XY pad - it sits next to the keys, you hit it without looking away.
37 keys = real two-hand chord work, the patch layout is wired to that range. No iPad on-screen keyboard, no compromise MIDI controller.
Audio path means the Modwave occupies an interface input, not a Loopy plugin slot. The plugin slots stay free for FX.
Your-rig equivalent: how to copy this without a Modwave
You do not own a Modwave (it is in Part II Substitutions as an "edge case" - Kristof's hardware is yours to replace, not to mimic 1:1). The substance to copy is the audio-not-MIDI philosophy and the three-zone patch layout. Your arsenal can rebuild it on the iPad:
Modwave role
Your equivalent
How it stands in
Wavetable engine
Aparillo (Sugar Bytes) + Mela wavetable osc
Aparillo brings the FM/wavetable cinematic character. Mela hosts an unlimited AUv3 count - spawn separate instances for the three "zones".
Bottom octave routes to a chord-trigger AUv3 (Scaler, iBassist), middle octave to wavetable synth, top octave / pad to XY-mapped FX.
Chaos Pad
Loopy XY pad widget + Turnado performance multi-FX
Map XY to wavetable position + filter + FX wet - same gesture, on-screen surface instead of physical pad.
Audio-not-MIDI to Loopy
Same architecture - record the synth output into a Loopy clip, don't sequence it from Loopy
Free of timing coupling, free of patch-change latency. The Kristof method does not need hardware to work.
Zero plugin CPU
Compromise - your iPad eats the wavetable DSP
This is the one role that needs hardware. If CPU is tight: bounce the synth take to a clip, freeze it, kill the live AUv3 instance.
whf-J9 01:11:30 Performing position: voice into the mic, iPad in reach, Modwave at finger range. The hardware-software handshake is physical proximity.
What gets lost if you cut the Modwave from your study of his rig
Read this section through the lens of the audio-not-MIDI design choice, not the brand name. The point is not "buy a Modwave". The point is:
Synths are audio sources for Loopy, not slaves of it.
Hardware is a way to offload CPU and offload patch logic - the patch already knows what each key does, the iPad does not have to compute it.
The Chaos Pad gesture gets printed into the clip - performance, not automation.
One physical object can serve three musical roles if the patch is designed for it.
The Modwave is the proof that Kristof's rig is not iPad-purist. He is happy to lift a function off the iPad onto a piece of hardware when the gain is clear - CPU, tactile control, three jobs from one object. The rest of the rig is iPad-heavy because the rest of the rig does not benefit from hardware. The Modwave does.
Hardware as a sample source, not a sequencer slave. Loopy records the audio, then chops, loops, mangles. That is the whole architecture in one sentence.
11
Performance Setup + iPad Settings
The whole rig collapsed onto a tabletop. iPad M4 + MOTU M4 + Modwave + guitar + mic, and that is the show.
No Helix, no MX-1, no Chaos Pad, no RC-505 MK2. Loopy Pro at 64 samples / 24-bit / 44.1 kHz
with zero CPU drama, because the choices upstream (clippers over limiters, free IR loader over built-in IR,
AUv3 amp sim over a hardware floor unit) were made with CPU as the first metric.
Current minimal rig (post-streamlining)
Five pieces. That is the whole signal source list. Everything routes through the iPad.
iPad M4 running Loopy Pro as the host, mixer, FX rack and looper
MOTU M4 audio interface, 4 inputs feeding the iPad
Korg Modwave synth, the one piece of dedicated hardware left on the table (see Sec. 10)
Microphone with no physical on/off switch, muted via a Loopy button instead
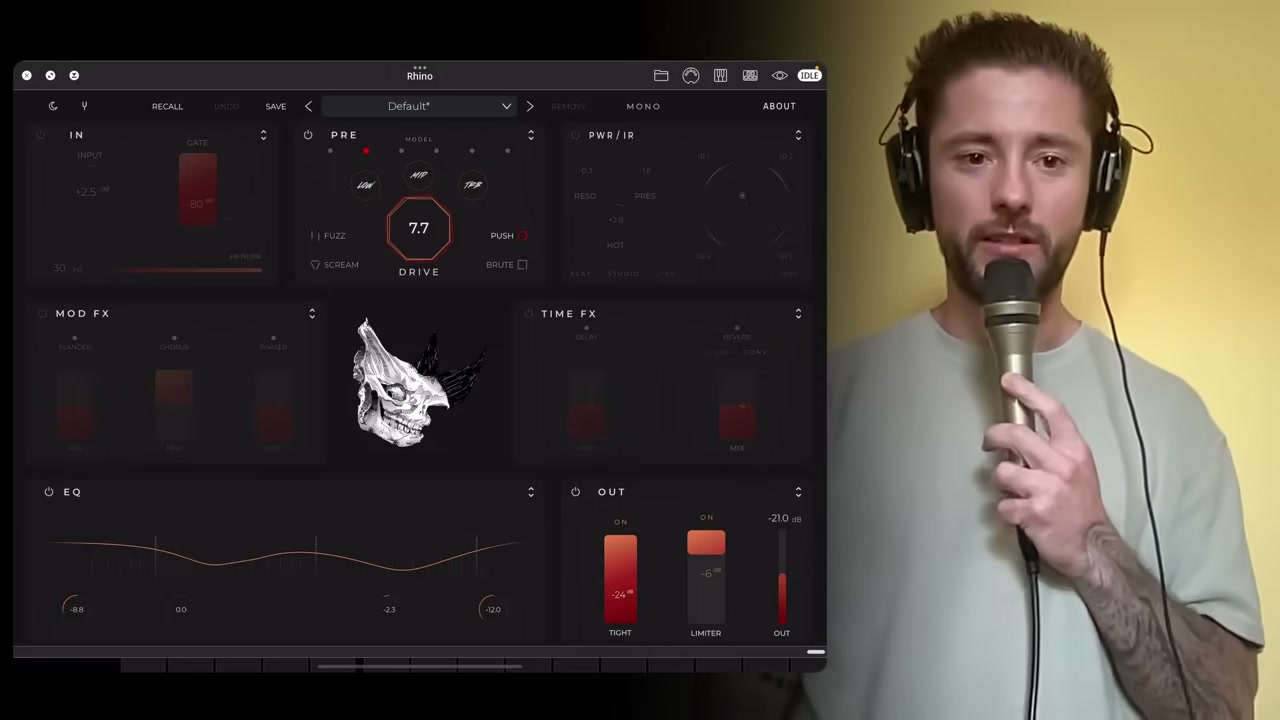
Guitar into Rhino amp sim (AUv3) + a free IR loader (the built-in IR is bypassed to save CPU)
Rhino AUv3 with the built-in IR section bypassed. External IR loader feeds the cab convolution at roughly one third of the CPU cost.
Previous setup (much bigger)
Then (60-120 cm table)
Now
Roland Chaos Pad
iPad + MOTU M4
+ Modwave + guitar
Roland MX-1 mixer
Boss RC-505 MK2
Korg Modwave
Line 6 Helix
Condenser mic + phantom power
"And now it's just a sound card, ModWave, and the iPad and the guitar."
- Kristof, on what survived the cull
iPad performance settings
The numbers he runs live. None of these are guesses. He has been gigging this exact profile.
64
Buffer (samples)
24
Bit depth
44.1
Sample rate (kHz)
CPU headroom (verified live)
No CPU issues on the M4 at 64 samples
Previously ran a 2020 iPad Air at 256 buffer for 3 years professionally - so the M4 at 64 is comfortable headroom, not the bleeding edge
Dynamics: clippers, not limiters
Clippers > limiters on the live path - zero latency, and slight clipping distortion is acceptable for live electronic music
ProL / ProQ used for metering only, disengaged, so he can watch levels without paying the lookahead latency tax
Guitar amp CPU trick
Built-in IR inside Rhino triples the CPU cost of the amp sim
Bypass it, drop a free IR loader after Rhino, load the cab IR there. Same tone, third of the CPU.
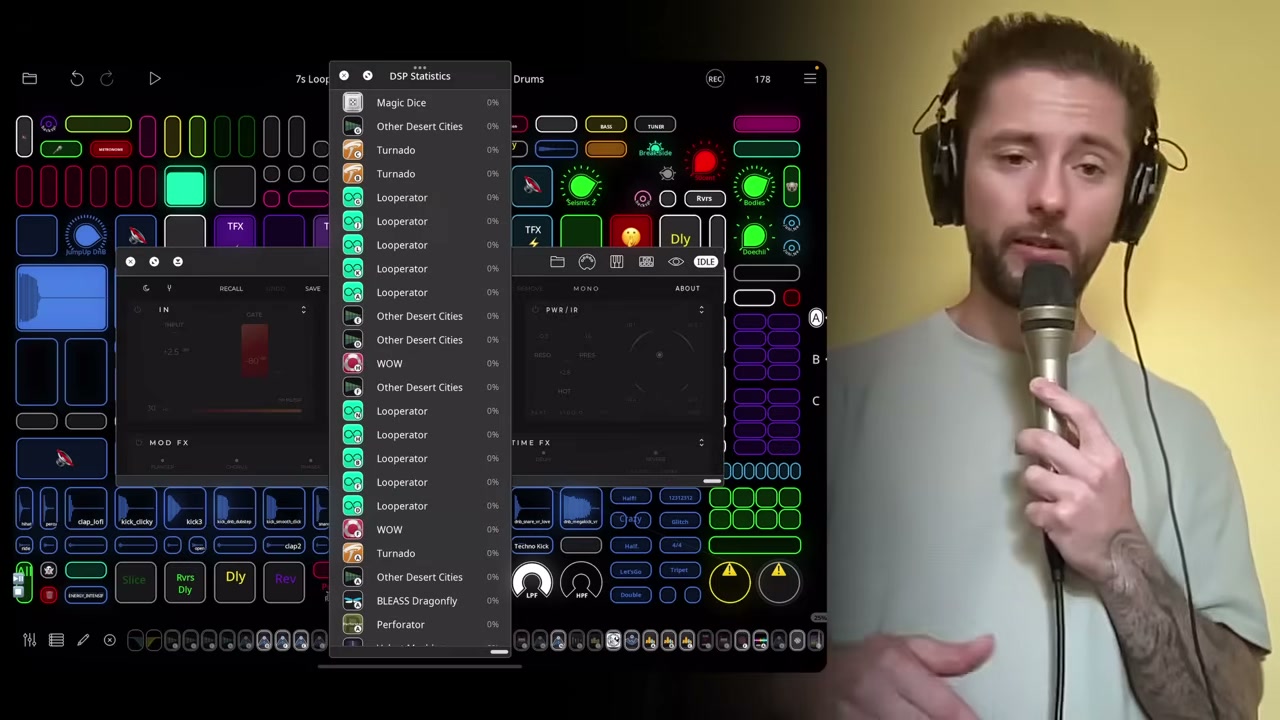
The Loopy Pro DSP Statistics overlay - this is how you find the plugin that is eating your CPU, not vibes. Magic Dice, Turnado, Looperator instances, Other Desert Cities, WOW, BLEASS Dragonfly, Perforator all listed with live CPU %.
Signal chain at a glance
  GUITAR ---->  Rhino AUv3 (IR section OFF)  -->  free IR loader  -->  +
  MODWAVE -->  MOTU M4 in  ---------------------------------------->  |
  MIC ------>  MOTU M4 in (mute via Loopy button) ------------------>  +--> Loopy Pro mixer
                                                                       |
                                                                       v
                                                          [CLIPPERS, not limiters]
                                                          [ProL/ProQ = meter only, off]
                                                                       |
                                                                       v
                                                          MOTU M4 out --> FOH ("just turn up")
Sound-engineer management
Arrive with a fully mixed output on the MOTU - the mix is already done before the signal leaves the iPad
Single directive to the booth: "just turn up the volume"
No per-channel EQ requests, no per-instrument level fader on the FOH desk - he hands them a stereo master and expects gain only
The whole "clippers, not limiters" + "metering-only ProL" stance only makes sense in this context: he is the mix engineer. The FOH person is a volume knob.
Mic mute button
His mic has no physical on/off switch
Workaround: a dedicated Loopy button wired to mute the mic channel
Single tap = mute, single tap = back live. No fishing for the right slider mid-performance.
What to copy
Choice
Cost paid
Why he does it
64-sample buffer at 24/44.1
Higher CPU load per voice
Live monitoring latency invisible
Clippers in front of limiters
Audible saturation on transients
Zero lookahead latency on the master
Bypass built-in Rhino IR
Extra plugin slot for free IR loader
~3x CPU saving on the amp sim
ProL/ProQ disengaged, meter only
No mastering chain on output
He already mixed it, monitoring without latency
Fully mixed stereo to FOH
No FOH per-channel control
Sound is consistent venue to venue
Mic mute as a Loopy button
One Loopy slot used for mute
Works with any mic, no hardware dependency
Part I · 12 + 13
Loopy as FX Processor + Playing with Bands
The same master template, the looping turned off. Kristof drops the entire Loopy Pro session into pure FX-rack mode for gigs where he doesn't loop, and uses the same rig as a band replacement when he plays with a drummer and a singer. One template, two business models, zero rebuild between them.
One template, three jobs: looper, FX processor, band rig.
The Loopy Pro session that powers the solo show also runs as a stage effects unit and as the click-and-stems backbone of a 3-piece. Same colour-coded buttons, same gestures, same CTZ master chain. He just stops recording loops and the rig is something else.
Mode A solo looper (default)Mode B pure FX processor, no loopingMode C looper + drummer + singer (band)
The three modes, side by side
Every block of the template is shared. What changes is which inputs are armed, which buttons get pressed, and whether the loop counter is moving. The CTZ master chain (chapter 7) is identical in all three.
Mode
Loopy is...
Recording loops?
Sends a click?
What the audience pays for
A Solo looper
The whole band. Drums, bass, vocals, modwave, FX, master.
YES
no
A one-man show. The looper IS the act.
B FX processor
Purely an effects processor. Reverb, delay, filters on buttons. No looping.
no
no
Vocal/guitar FX on his Loopy buttons, the rest of the night is normal playing.
C Band replacement
Loops instrumentals. Sends kick/click to the drummer.
YES (instrumentals only)
YES → drummer
Three humans on stage instead of five. More money per head.
Mode B · Loopy as pure FX processor (no looping)
Sometimes the gig isn't a looping gig - it's a normal band slot, a DJ guest spot, a corporate event. Kristof still wants his exact FX vocabulary on the same buttons. Solution: load the master template, never press a record button. The Looperator stacks, Flux Mini 2 sidechains, modwave routing and CTZ master chain all stay alive - the loop tracks just stay empty.
Loopy Pro runs as a pure effects processor - reverb, delay, filters bound to the same colour-coded buttons.
Used for gigs where he doesn't loop but still wants his effects vocabulary on stage.
The Looperator stays useful: stacked Looperator presets still chop and re-time live signal (chapter 5).
Flux Mini 2 sidechain presets still pump live signal against an internal kick pattern (chapter 6).
The whole CTZ bus-to-bus master chain (chapter 7) still does the gain-staging and clip-to-zero limiting before FOH.
Mic mute still lives on a Loopy button (chapter 11) - the mic itself has no on/off switch.
"Sometimes I use Loopy Pro purely as an effects processor - no looping, just reverb, delay and filters on buttons."
on gigs where he doesn't loop
FX-mode · what stays live, what goes silent
Same .lpproj. Different parts of it powered up. The "stays live" column is everything that processes signal in real time; the "goes silent" column is everything tied to time-stretched loop playback.
Stays live in FX-mode
Track FX racks on every colour-coded bus column.
Looperator stacks - still chop live input.
Flux Mini 2 sidechain presets (5 kick patterns ready).
Mic mute button.
Rhino + free IR loader on the guitar input.
CTZ master chain - clip-to-zero into FOH.
Modwave (analog in, played by hand).
Mute combos and crash-on-the-one gestures - they still fire if you map them to processed input.
Goes silent in FX-mode
Pre-produced top loops - never triggered.
Step Dial drum preset packs - irrelevant, no drums loop.
Amen breaks + fills bank - sleeps.
Neuro Bass Generator 2000 bass loops.
Color Bass recorded layers.
Bass resampling (gray buttons).
Acapella system recorded vocal stems.
Buildups bound to loop-mute-combos.
Why this works · the template was already built with the philosophy that every channel can route through track effects or bypass them (chapter 5). FX-mode is just "all channels armed for FX, none armed for record". No new session, no new mapping, no new muscle memory.
Mode C · Playing with bands
The same rig deployed as a band replacement: a real drummer in the back, a real singer in front, and the looper holds down everything in between. The drummer needs a click. The singer needs a band. Loopy does both at once.
Loopy Pro acts as the band replacement - loops the instrumentals (bass, modwave, pads, FX).
Sends a dedicated kick / click to the drummer (in-ears or wedge feed), so the human drummer plays in time with the looped instrumentals.
The singer is acoustic-natural - voice on top of the looper + drummer.
Pure FX-mode is also available inside a band setup (Mode B above) when the night calls for it.
The signal flow on stage
[ KRISTOF ][ DRUMMER ][ SINGER ]
| | |
v v v
guitar + modwave + acoustic kit vocal mic
mic into MOTU M4 following click
| |
v v
[ Loopy Pro iPad M4 ] <------- click bus --------> (FOH gets singer +
- loops instrumentals ^ drums + looper sum)
- kick / click out |
- FX racks live |
- CTZ master chain |
| |
+----- click feed -----------+ (drummer in-ear / wedge)
|
v
[ FOH ] full instrumental loop bed + processed mic if used
The economics · why the math works
Configuration
Headcount
Per-person earnings (Kristof's claim)
Full band (live)
5+ humans (bass, gtr, keys, drums, vocals)
Fee divided 5+ ways. Low.
Looper + drummer + singer
3 humans
Same gig fee, divided 3 ways. More per person than a full band.
Solo looper
1 human
Whole fee, but smaller venues, harder to fill the stage energy.
"Looper + drummer + singer earns more per person than a full band."
on the band-replacement math
Why this section matters · the template is the product
Every other chapter in this compendium described how Kristof built one Loopy Pro session. This chapter is the payoff: that one session is three different shows. The investment in the master template (chapter 2) pays back across every gig type he books, not just the looper gigs.
solo looperFX-only band slotlooper + drummer + singercorporate / DJ guest spotstudio pre-juice (album "Shocked")
The same .lpproj, the same colour-coded buttons, the same gestures (1 button = many actions, chapter 2), the same CTZ master chain. Mode-switching is mental, not technical. There is no "FX template" and no "band template" - just the master template, with different buttons left untouched.
Applying it to your rig
You don't need a new session to copy this. You need discipline about not pressing record, plus one extra output bus for the drummer click. The template you already built for solo looping is 95% of the work.
What Kristof does
Direct match in your arsenal
Edge case / substitution
FX-mode = don't record
Built into Loopy Pro by default. Open your existing template, do not arm the record buttons. Same gestures still fire.
Optionally save a session variant with all record-arm states pre-disabled so you can't fail-press.
Stacked Looperator on live input
Looperator on any input bus - same plugin, same stacked-preset workflow as in chapter 5.
If no Looperator: Turnado (multi-FX-per-button), Ruismaker FRMS or Bleass Delay on a button per FX.
In FX-mode there's no internal kick to trigger from. Either send a silent ghost kick track for the sidechain to follow, or use an LFO-based pumping plugin instead.
Click to drummer
MOTU M4 output 3-4 (or analogous channel on your interface). Loopy Pro routes Loopy's internal clock or a kick track to that pair.
Two-output interface (M2): use the headphone send as the click bus and keep the FOH on main outs.
CTZ master chain unchanged
Run all three modes through the same clip-to-zero mastering chain (chapter 7).
In band-mode, FOH may want to handle compression themselves. Be ready to bypass the master limiter on demand.
FX-mode + Bands · the distillation
Sessions on disk
1
The master template, period.
Live modes
3
Solo looper / FX processor / band rig.
FX-mode trigger
Don't record
Everything else stays alive.
Band-mode add-on
Click bus
Kick / click out to the drummer.
Money
3 > 5
Per-head earnings beat a full band.
Insight
Template = product
One build, many gigs.
Part I · 15
Creative Process + Mindset
The gear is downstream. Kristof writes live first, lets the loop become a song instead of building a song around a loop, and treats every crash, mis-press, and random button as raw material. This section is the philosophy that drives the entire signal chain in the rest of the doc.
"A loop is just a loop... Loopy enabled me to make the loop not just a loop."
The four philosophy quotes in this section frame the whole rig. Read them before judging any plugin choice or signal path.
Method improvisation first, song secondTooling 360 camera as inspiration archiveStance live energy over robot perfection
Improvisation-first
Songs do not start on a DAW grid. They start on a stage, in front of a crowd, on a synth that happens to be patched in that night. If the audience reacts, the moment gets battle-tested into a song.
Many songs originated from live moments that worked with audiences.
"Suddenly": a freeze-bass idea was played live, the singer reacted positively on the spot, and the moment became a recorded song.
Ideas are battle-tested live before they get committed to a song file. The crowd is the A/B test.
"Finding the real meaning of looping for me right now is a big focus."
SpeshFX 2025
360 camera review
The 360 camera is the secret writing tool. Every gig is documented in full panoramic capture, then mined later for ideas the conscious mind missed in the moment.
A 360 camera records almost every gig.
He reviews footage when stuck to extract inspiration.
The camera turns ephemeral stage accidents into a searchable archive of happy-accident raw material.
Album "Shocked"
The latest record is on every platform. The interesting part is how Loopy Pro fits into a studio workflow that ends in Ableton: not as a final destination, but as a pre-juice tone shaper on the way in.
SpotifyApple Musicall platforms
Practice
What happens
Loopy as pre-juice
Some album parts run synths through Loopy first as a tone shaper, then land in Ableton for arrangement.
"Mantra" vocal FX
The glitchy vocal effects in "Mantra" were discovered by pressing random effect buttons. Not engineered, found.
COVID album
The previous COVID-era record: he openly "considers it a mess". Disagreement with one's own past output is part of the practice.
Error recovery (Barcelona story)
The defining test of a live-looper is what happens when the rig dies on stage. Barcelona is the case study.
[1] SOUND DIES MID-SET            barcelona, full silence, crowd staring
        |
        v
[2] CALMLY RESTART                  Loopy Pro + soundcard, no panic, no apology
        |
        v
[3] BURST BACK WITH BEATBOX         no waiting for the rig - mouth is the backup synth
        |
        v
[4] SET CONTINUES                   the failure becomes part of the show
Sound died mid-set in Barcelona.
Loopy + soundcard were calmly restarted, no on-stage panic.
He burst back with beatbox. The voice is the always-available backup instrument.
Philosophy quotes
Four direct quotes. These are not poster slogans, they are the operating contract behind the rig. The Loopy choice, the analog signal chain, the 360 camera and the freeze-bass technique all back-fit into these sentences.
"A loop is just a loop... Loopy enabled me to make the loop not just a loop."
on why Loopy Pro
"Whatever we have left is the live energy - you can put robots on stage but it's robot energy."
on live vs sequenced
"Maturity in music, then looping - maybe even more important than titles."
judging philosophy, SpeshFX
"Finding the real meaning of looping for me right now is a big focus."
SpeshFX 2025
The mindset distilled
Source
Live moments
Songs come from gigs, not the other way around.
Archive
360 camera
Every gig captured, mined for ideas when stuck.
Method
Random presses
"Mantra" vocal FX found by pressing random buttons.
Failure mode
Calm restart
Barcelona: restart, beatbox, continue.
North star
Live energy
Robot energy is the thing this rig refuses to produce.
Part III
Bass Design Laboratory
How to actually build Kristof's "Neuro Bass Generator 2000" plus five other bass forms inside Loopy Pro, using plugins you already own. Source: the Loopy Pro Command Center orphan doc neuro-reese-bass-map.md, synthesised from Euro's "Theory of Neuro Bass & 29 Tricks", VRDNK's "3 Reese Methods", the OG Reese history, Sans Myers' "UK Garage Basses", the Kristof7s interview, and the INKIE template analysis.
The core formula
Every neuro/Reese bass follows the same architecture. The magic is stacking layers of filtering and nonlinearity, each one reacting to and reshaping what came before. Stop when it sounds good. Resample. Stack more if you want.
The loop IS the sound source. You skip the synth stage entirely. Your recorded bass loop feeds directly into the filter -> distortion chain. Intermodulation distortion creates new harmonics from whatever frequencies are already present.
Phase 1
Sound Sources (loop-based in Loopy Pro)
Source
How (using YOUR plugins)
Character
Any bass loop
Record into a purple-color clip in Loopy
Whatever you played, transformed
Reese from synth
Mela: 2 detuned saw oscillators
Classic phasing
Sine wave
Mela: single sine -> harmonics added downstream via distortion
"Sign compression" - clean start
Existing sample
Load into Koala Sampler / AudioLayer / BLEASS SampleWiz 2 -> process
Build the ENTIRE neuro chain inside ONE Mela instance.
Why: Mela can stack filter, distortion, more filter, more distortion natively. One Mela instance instead of 5-7 separate AUv3 plugins. CC Modulator linked to a single Loopy macro. Preset slot = recallable chain.
Mela Instance: "Neuro-Bass-Generator-2000"
  Modules in order:
  - Volume       (CC#1 = bypass/level via CC Modulator)
  - Filter       (notch + LFO)
  - Distortion   (Mela built-in)
  - Filter       (bandpass + LFO, different rate)
  - Distortion   (different character - could be the built-in clipper)
  - Crossover + Stack (multiband, parallel paths)
  - Clipper      (hard, 0 dBFS)
  - Oscilloscope (visual flat-top check)
Save preset. Drop the instance on the bass bus. One Loopy button -> triggers CC#1 -> enable/disable.
CPU saving: Mela's internal chain is one process, lighter than 7 separate AUv3 instances.
You own Mela base + Collections 1-5 (one app, unlimited AUv3 instances - here you'd typically spawn 1 per source bus). This is the most CPU-efficient way to run the neuro recipe.
Phase 5
Reese Construction Methods (beyond Neuro)
Method 1 - Classic Detuned
What people usually think is "OG Reese" (it isn't - see history below).
Parameter
Value
Notes
Osc A
Saw wave
Or soft saw for OG flavor
Osc B
Saw wave, detuned
Same waveform
Detune
30-60 cents per osc
More = faster wobble
Phase
Random for variation, fixed for sub layering
-
Voicing
Mono + glide (100-200 ms)
-
Your plugin: Mela (2 oscillators, fine-tune offset) OR VOLT Synth (Kai Aras analog Minimoog-style, 22.99 EUR) OR Animoog Z (Moog, unlock 34.99 EUR).
Method 2 - Looped Sample Method (VRDNK technique)
Render a sustained note with movement, loop a tiny section.
1. Render an 8-bar sustained bass note in Mela (saw + detune + flanger/phaser)
2. Add movement: LFO on detune, notch filter sweep, sub fade in/out
3. Bounce to audio (record into Loopy gray channel)
4. Load into BLEASS SampleWiz 2 or Koala Sampler
5. Set MONO + GLIDE
6. Enable LOOP mode on a very short section
7. Move loop start point to find sweet spots
Why cool: higher notes = faster playback = loop gets shorter = Reese "speeds up" naturally. Lower notes = slower wobble. You can automate loop length independently of pitch.
Method 3 - FM Reese (VRDNK calls it "hardest but most rewarding")
Osc C (detuned few cents, octaves up)
  -> FM-modulates Osc B (up octaves)
    -> FM-modulates Osc A (audible carrier)
Parameter
Setting
Carrier (A)
Triangle wave, audible output
Modulator (B)
Triangle, +1-2 octaves, FM amount controls intensity
Modulator (C)
Triangle, +1-2 octaves, detuned few cents - THIS creates the movement
Phase
Fixed (NOT random) - phase position of B dramatically changes character
Key difference vs Method 1: classic detuned = one-dimensional up-down wobble. FM Reese = two-stage, back-and-forth rhythmical friction. Moving FM oscillators up octaves = faster modulation rate.
Your plugin: Aparillo (Sugar Bytes FM/wavetable cinematic - perfect fit) OR Nikaya (Cem Olcay wavetable + FM, 7.99 EUR) OR Mela FM module.
Method 4 - Sine Wave Reese (UK Garage SOSA style)
The dominant UKG bass sound right now.
Parameter
Setting
Osc A
Sine, -1 octave
Osc B
Sine (copy), slightly different fine-tune
Sub
-2 octave sine (clean foundation)
Voicing
Mono
Wobble control: map a single macro to both oscillators' fine-tune (one negative, one positive). Macro at center = unison, move outward = increasing wobble speed.
Your plugin: Mela (2 sine oscillators + sub, map detune spread to widget knob). Dead simple, very effective.
Method 5 - Stussy Bass (plucked 5th - UK Garage)
Named after Chris Stussy's "All Night Long". Now everywhere in UKG / Speed Garage.
Osc A: Sine, -2 octave
Sub: ON
Phase Distortion / FM: small amount (adds harmonic content)
Filter: Low-pass to keep it round
Envelope: adjust release for bounce
Optional: pitch envelope on attack for "knock"
Aggressive variant: increase PD/FM amount, add modulation to PD amount over time, keep low-pass tighter.
Your plugin: Mela FM OR Aparillo FM. Keep it simple - rhythm and note programming matter more than sound design.
Physics
Why Reese works
Beating / interference
Two close frequencies played together create amplitude modulation (wobble) at the rate of their frequency difference:
A1 = 110 Hz,  A#1 = 116.5 Hz
Together -> wobble at 6.5 Hz (perceived as pulsing)
Pitch-dependent speed: the beating rate doubles every octave up, halves every octave down - even at the same interval. This is why Reese bass naturally "speeds up" on higher notes and "slows down" on lower ones.
Distortion amplifies beating: the interference pattern becomes more dramatic through any nonlinearity. This is why filter -> distortion chains make Reese movement so pronounced.
The low-end problem
Detuned oscillators cause phase cancellation in sub frequencies - lumpy, unstable bottom end. Cool for breakbeats, problematic for drops.
Solution: high-pass the Reese above ~80-100 Hz, layer a single non-detuned sine wave underneath for clean sub. In Loopy: use TB Lowtone or Bass Mint to generate the clean sub layer.
History
The OG Reese: history & truth
Common myth
Reality
Synth
Roland Juno (subtractive)
Casio CZ-5000 (phase distortion synthesis)
Method
Detuned saw waves through filter
Phase-distorted sine waves, NO filter (the CZ has none)
Track
-
"Just Want Another Chance" by Reese (Kevin Saunderson), 1988
Detuning
-
~30 cents per osc (60 cents total), CZ-5000's max capability
Kevin Saunderson is one of the Belleville Three (founders of techno)
The sound wasn't called "Reese bass" until London jungle producers sampled it - notably Ray Keith's "Terrorist" by Renegade
Kevin didn't know the term until he visited London
People recreated it with subtractive synths because those were common - the recreation became the standard
Universal Tips
Reese tips (all methods)
EQ before distortion is everything. Filtering sub content before distortion changes the result completely. Too much sub into distortion = flat square wave with no character.
Common mistake: adding more distortion when it sounds flat. Real fix = reduce sub content before the distortion stage.
Notch filters > bandpass for the classic sweeping movement effect.
Always layer a clean sub: high-pass the Reese, add separate mono sine underneath.
Flanger before distortion adds movement that distortion then amplifies.
Default unison detune is usually WAY too wide (often 200 cents / 2 semitones). Keep it 30-120 cents total.
Phase randomness: random = variation per note (more natural). Fixed = consistent (better for sub layering and FM character control).
Meta
The meta-principle
From Euro's "Theory of Neuro Bass" video, the single most important insight:
"All the finesse and variation lies in picking the right ways of filtering, adding movement, and nonlinearities... stacking them to make it sound more and more interesting."
It's not about any specific plugin or setting. It's about stacking layers of FILTER -> DISTORTION -> FILTER -> DISTORTION, each one transforming the output of the last. The sound gets more complex with each stage.
Stop when it sounds good. Resample. Stack more if you want.
This is exactly what Kristof does with one button - and why it works on ANY bass loop.